Linking to the IIJ ID Service
By linking to the IIJ ID Service, not only operation managers but a person who has an IIJ ID Service account can manage the DNS platform service. Additionally, people who use an IIJ ID Service account can set reference and editing roles of zone information by contract zone at the granular level.
[ Reference ]
- The IIJ ID Service is an ID management service (IDaaS) in the cloud that links to various service IDs enabling single sign-on (SSO).
- With the IIJ DNS Platform Service, you can link to the IIJ ID Service that is contracted for the same Service Group.
- Linking to or unlinking from the IIJ ID Service must be operated by an operations manager who has both permissions shown below. Refer to "登録が必要な担当者" (Japanese Only) from "ご利用にあたって" (Japanese Only) for IIJ Service Online for more information on each authority of an operations manager.
- Management permission of this service
- Management permission of the service group
- Refer to "利用方法> 契約と担当者の管理" (Japanese Only) in "IIJサービスオンラインご利用にあたって" (Japanese Only) from "ご利用にあたって" (Japanese Only) for IIJ Service Online for how to check if you are an operations manager who has the management permission of the service group.
- Linking to the IIJ ID Service
- Cancelling the Link with the IIJ ID Service
- Assigning a Role to an IIJ ID Service Account
- Cancelling the Role Assigned to an IIJ ID Service Account
Linking to the IIJ ID Service
Use the following procedure to link to the IIJ ID Service.
Log in to the control panel as an operations manager who has both permissions shown below. Refer to "Logging In" for more information on how to log in.
- Management permission of this service
- Management permission of the service group
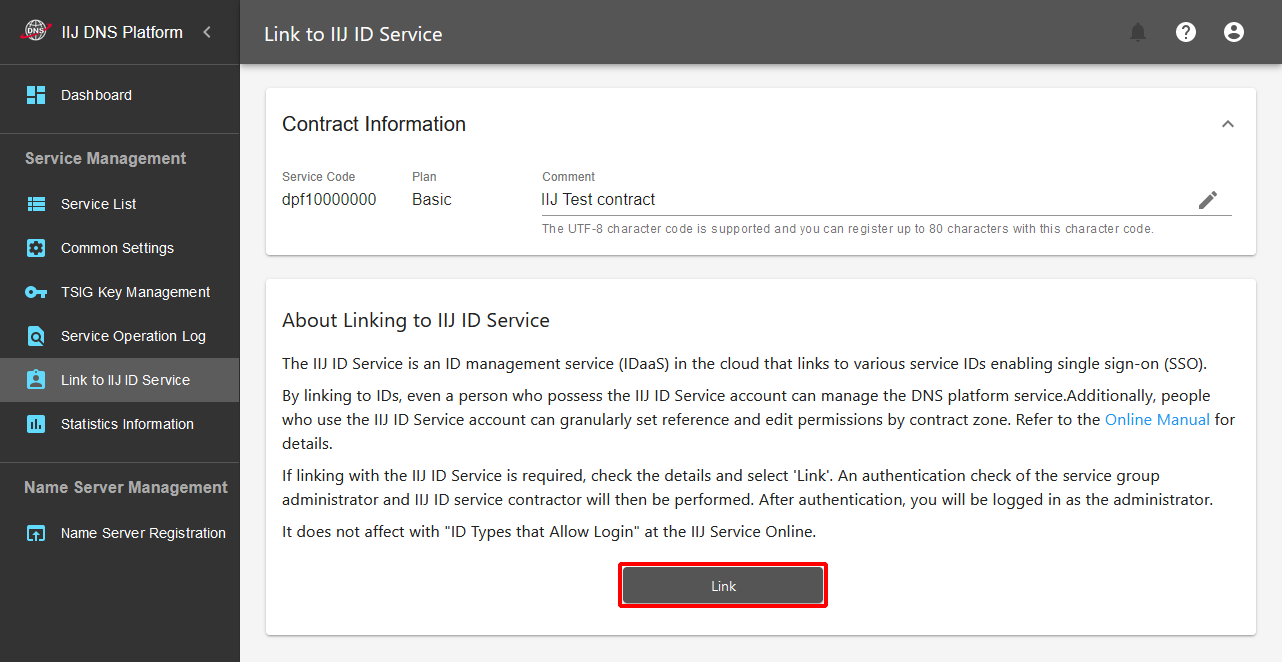
- Open Dashboard.
- Select a service code (dpfxxxxxxxx) for the IIJ DNS Platform Service.

- Click "Link to IIJ ID Service."

- Click "Link."
The IIJ ID Login screen appears.
Enter the account of the IIJ ID Service initial administrator in "ID," and then click the "Next" button.[ Note ]
If you have logged in using an account other than that of the IIJ ID Service initial administrator, you cannot link to the IIJ ID Service.
Click "
 " located in the upper right of the control panel to log out once, and then log out of the IIJ ID console (https://www.auth.iij.jp/console/) too. Then, redo the operation from step 1.
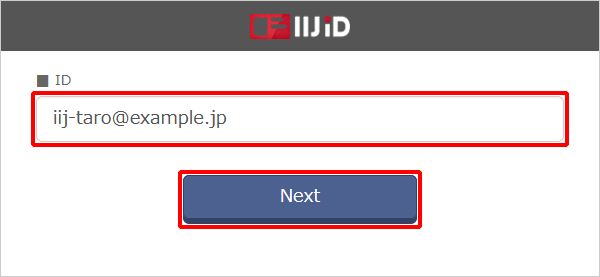
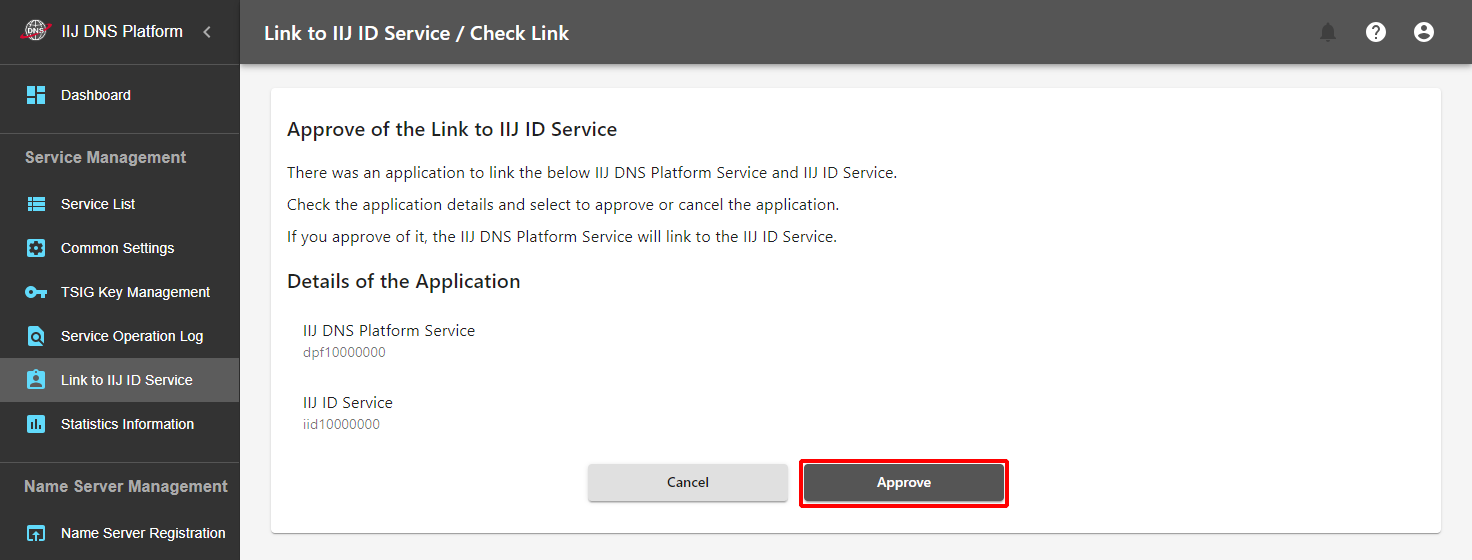
Follow the instructions on the screen to enter the authentication information. The authentication information varies depending on the IIJ ID Service settings. Refer to the "IIJ ID Service Online Manual" for more information.
Click "Approve."
After linking to the IIJ ID Service, roles can be set with respect to user and group accounts. After linking to the IIJ ID Service, it may take some time before you can set a role. Refer to "Assigning a Role to an IIJ ID Service Account" for more information on role types and how to set them.
[ Note ]
For the following group-related operations, it may take up to one hour for the settings to be reflected.
- Assignment, change, and deletion of roles/authorities to the operations manager group
Addition and deletion of accounts to and from the operations manager group
Cancelling the Link with the IIJ ID Service
Use the following procedure to cancel the link with the IIJ ID Service.
[ Note ]
After cancelling the link with the IIJ ID Service, you can no longer log in to the control panel and perform service management using the IIJ ID service account.
In addition, you can cancel the link with the IIJ ID Service only when you are logged in as an operations manager. If you are logged in using an IIJ ID Service account, log out once and log in again as an operations manager.
- Log in to the control panel as an operations manager who has both permissions shown below. Refer to "Logging In" for more information on how to log in.
- Management permission of this service
- Management permission of the service group
- Open Dashboard.
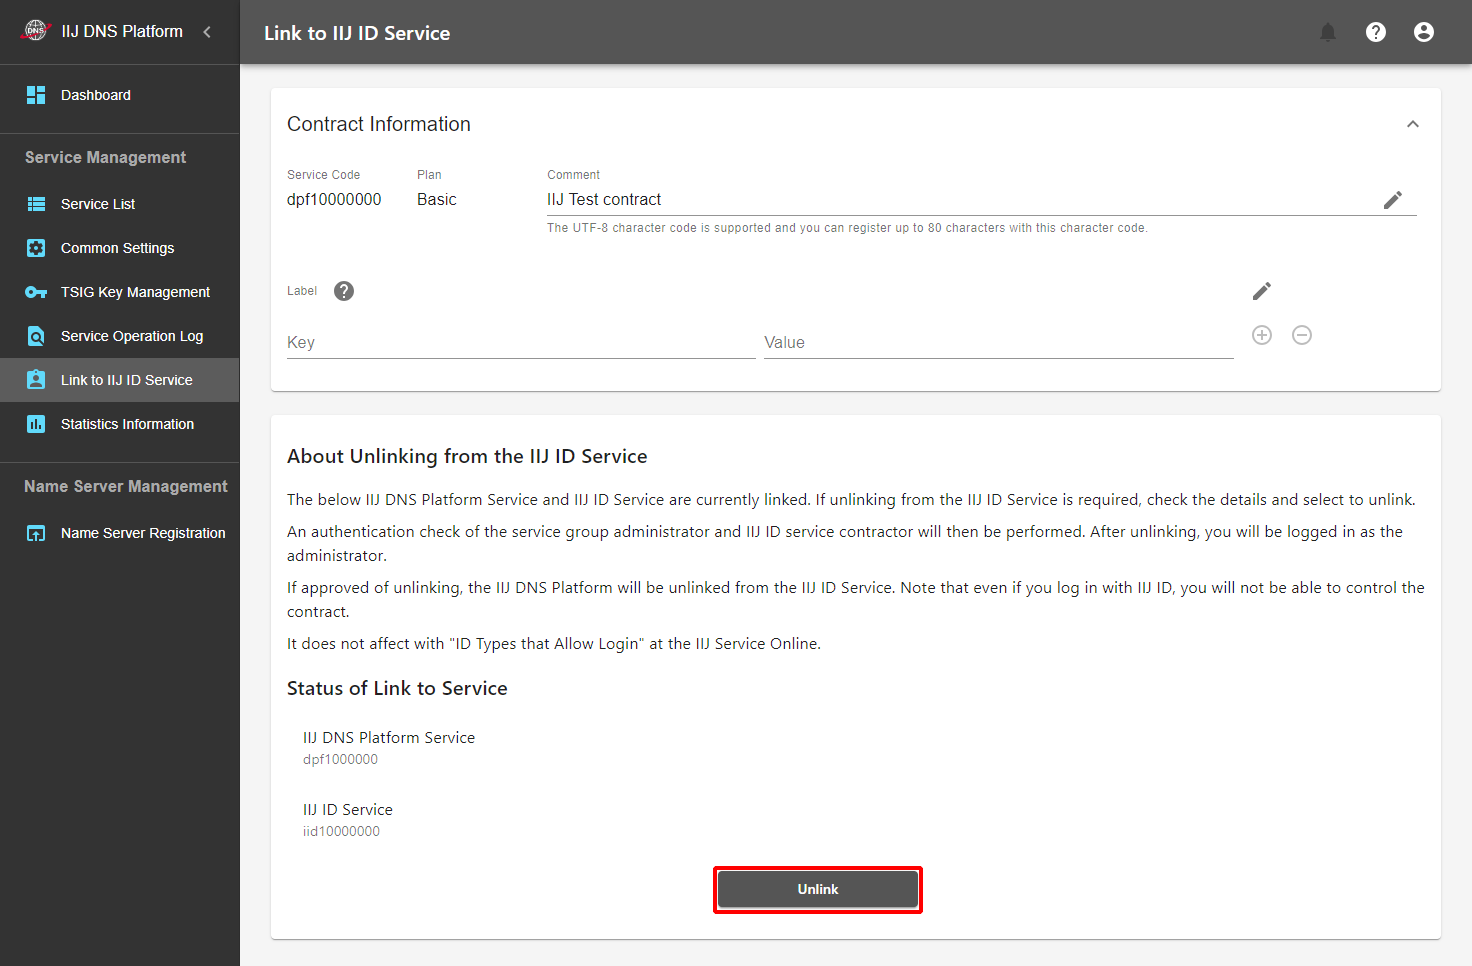
- Select a service code (dpfxxxxxxxx) for the IIJ DNS Platform Service.
- Click "Link to IIJ ID Service."
- Click "UnLink."
The IIJ ID Login screen appears.
Enter the account of the IIJ ID Service initial administrator in "ID," and then click "Next."[ Note ]
If you have logged in using an account other than that of the IIJ ID Service initial administrator, you cannot cancel the link with the IIJ ID Service.
Click "
" located in the upper right of the control panel to log out once, and then log out of the IIJ ID console (https://www.auth.iij.jp/console/) too. Then, redo the operation from step 1.- Follow the instructions on the screen to enter the authentication information. The authentication information varies depending on the IIJ ID Service settings. Refer to the "IIJ ID Service Online Manual" for more information.
- Click "Approve."

Assigning a Role to an IIJ ID Service Account
[ Note ]
It is recommended that you avoid managing permissions only by the initial administrator and assign an "Administrator" role to two or more persons.
After linking to the IIJ ID Service, you need to perform appropriate role management with respect to the operations manager’s IIJ ID Service account.
There is no function for taking over the role of the operations manager. When taking over the role and authority to a new operations manager, assign a role for each management target.
Because the assignment task becomes cumbersome and complicated when there are many management targets, consider creation of a shared IIJ ID account with a goal of staff management or system management using a group account.
Use the following procedure to assign a role to an IIJ ID Service account.
Select "Log in with IIJ ID" on the Login screen.
[ Reference ]
If you are logged in to the control panel, click "
" located in the upper right of the control panel to log out, and then log in with the IIJ ID Service.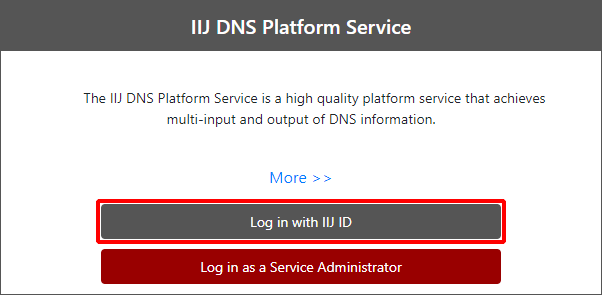
The IIJ ID Login screen appears.
Enter the account of the IIJ ID Service initial administrator in "ID," and then click "Next."[ Note ]
If you have logged in using an account other than that of the IIJ ID Service initial administrator, you cannot set a role for the first time.
Click "
" located in the upper right of the control panel to log out once, and then log out of the IIJ ID console (https://www.auth.iij.jp/console/) too. Then, redo the operation from step 1.- Follow the instructions on the screen to enter the authentication information. The authentication information varies depending on the IIJ ID Service settings. Refer to the "IIJ ID Service Online Manual" for more information.
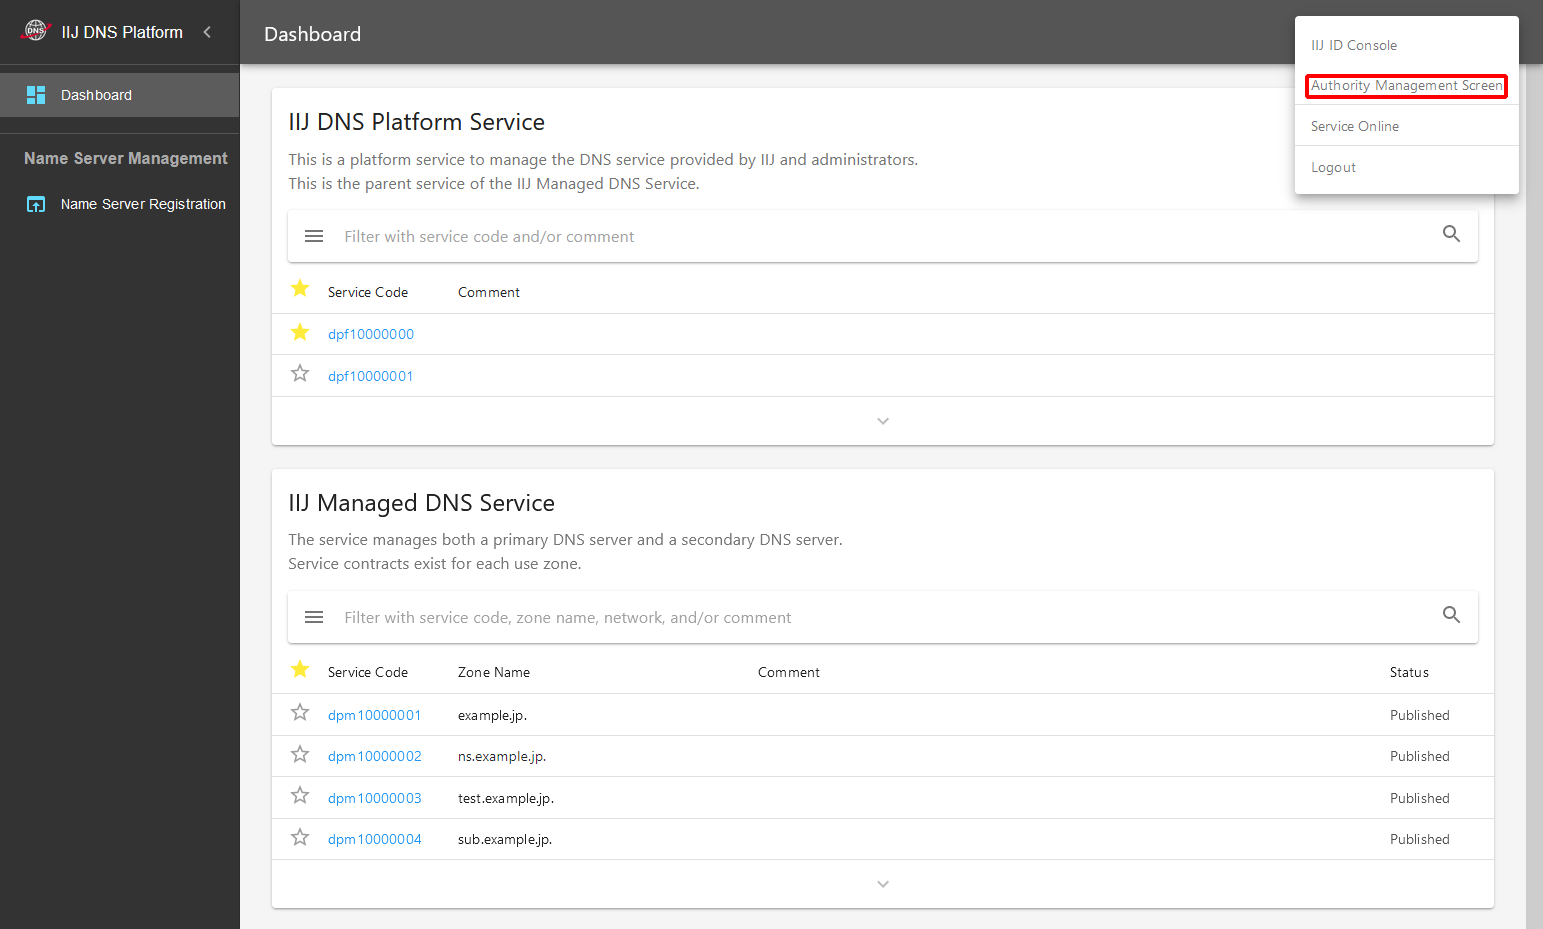
- Click "" located in the upper right of the control panel.
Click "Authority Management Screen."
Click "Add Authority" for the target service code.
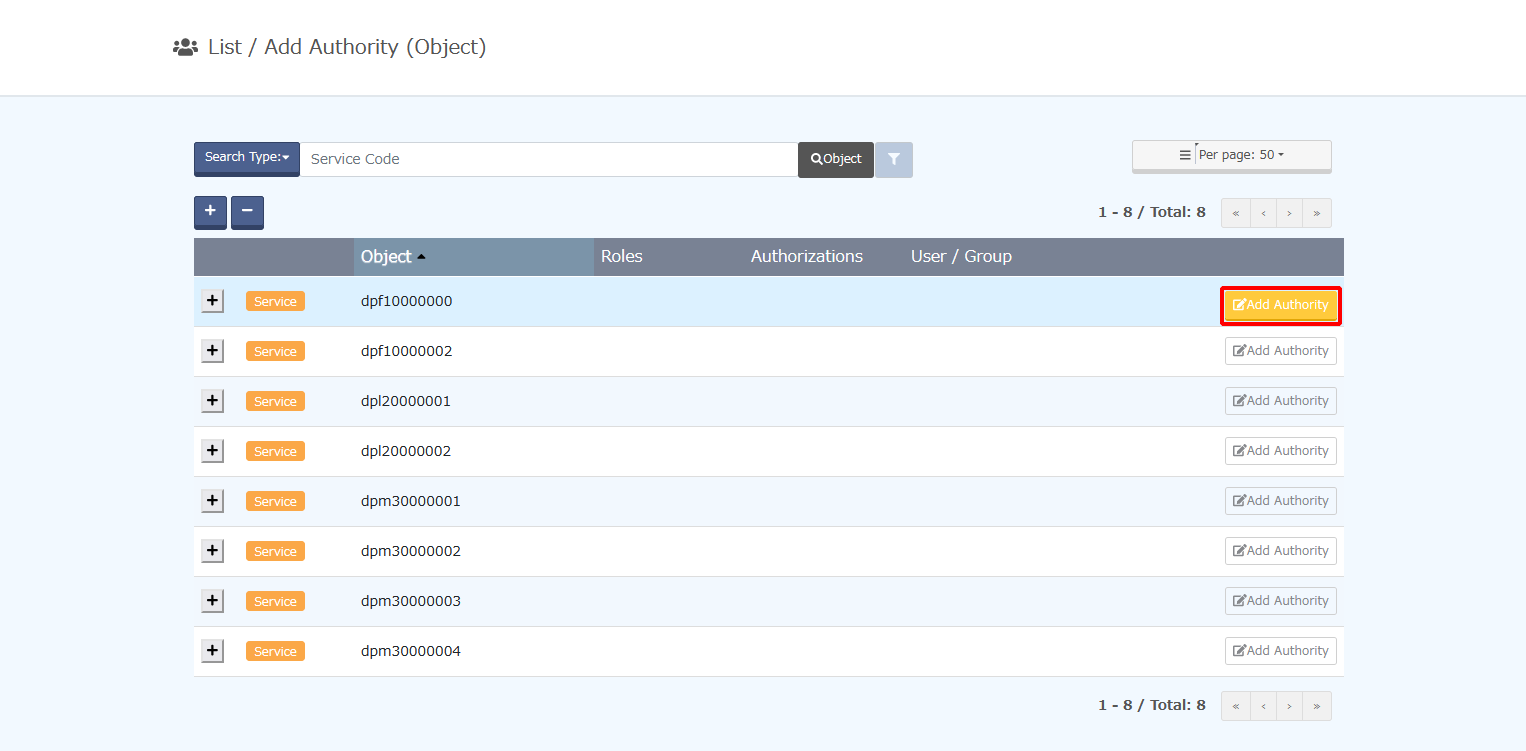
Service code for the management target Description of management Notes dpfxxxxxxxx Settings and view management for the following menus in "Service Management" on the control panel are targeted.
- Service List
- Common Settings
- TSIG Key Management
- Service Operation Log
- Link to IIJ ID Service
Settings for the "Name Server Registration" menu for "Name Server Management" can be operated without the role for dpfxxxxxxxx. dpmxxxxxxxx Settings and view management for the following menus in "Zone Management" on the control panel are targeted.
- Record Management
- DNSSEC Management
- Zone Application History
- Zone Proxy Management
- Zone Operation Log
- A role with respect to each "Zone Management" menu can be set for each zone.
- Settings for the "Name Server Registration" menu in "Name Server Management" can be operated without the role for dpmxxxxxxxx.
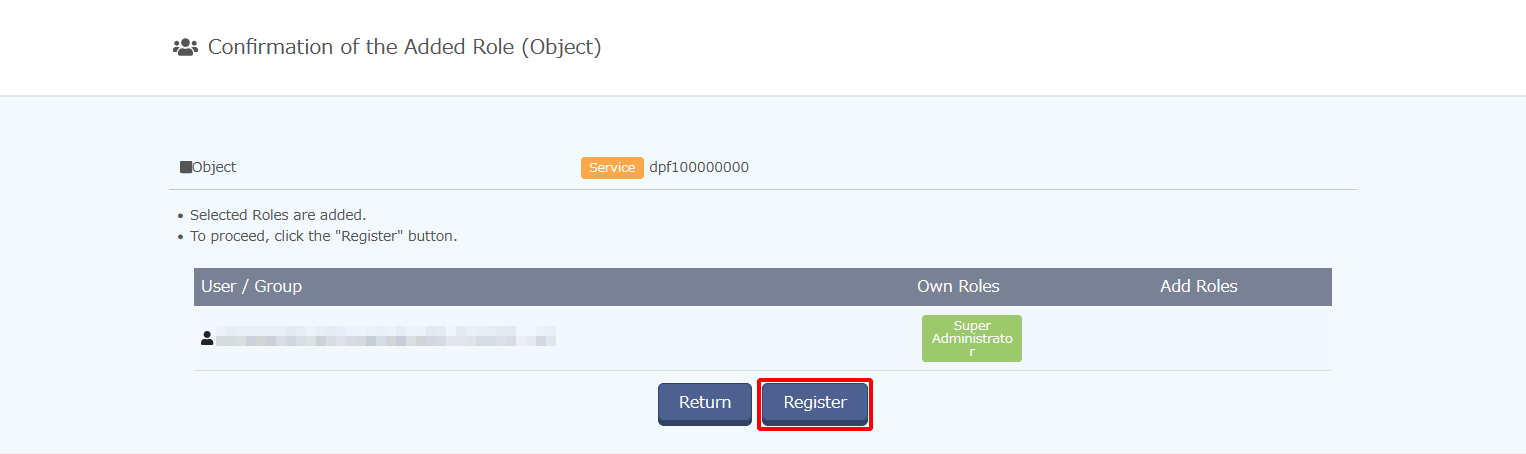
Specify the role information to add, and then click "Confirm."
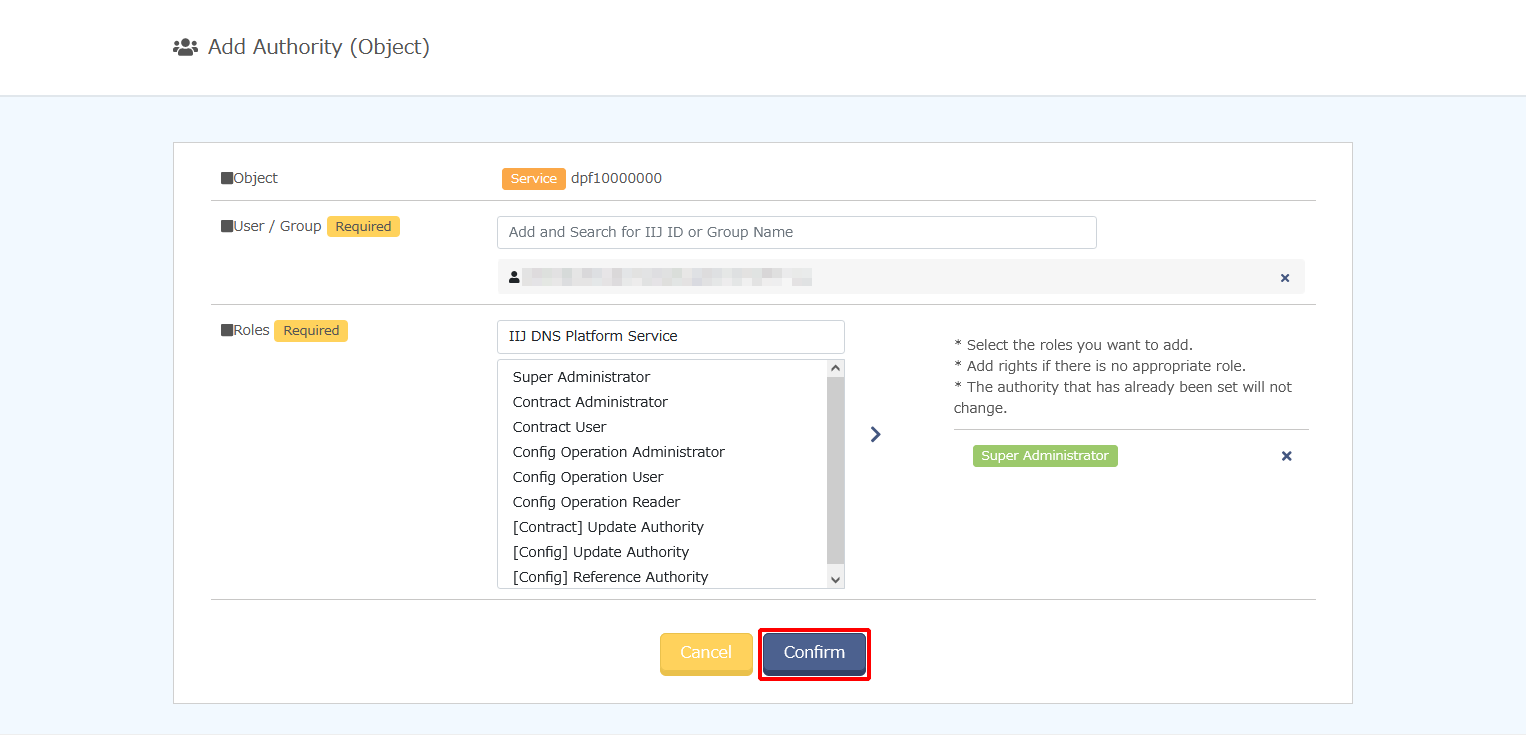
Item Description Notes Operations manager/operations manager group Enter the user account or group account of the IIJ ID Service to which to add a role for the target service code.
*Partially-matched users or groups are displayed as prediction candidates under the search column.Roles/authorities Select one from the list and click "
 ." The roles and authorities to be added are displayed on the right-hand side.
Multiple roles and authorities can be added. The types of role and authority are as shown below. Also refer to "Examples of role settings by major purpose."
Role/authority Description Notes Super Administrator Initial management role to be assigned to an account with which IIJ ID link has been executed. A person with this role can perform all operations assigned. If you log in as an operations manager, you will have role contents that are the same as those for this role. Super User This role is not used for DPF. Contract Administrator A person with this role holds authority of both "[Contract] Update Role" and "[Contract] Authority Update Role." Contract User A person with this role holds authority of both "[Configuration] Update Role" and "[Configuration] Authority Update Role." Config Operation Administrator A person with this role can add contacts for related services and options, and cancel contracts. Config Operation User A person with this role can configure settings for services and options. Config Operation Reader A person with this role can reference settings for services and options. Invoice Reader This role is not used for DPF. Operation Administrator This role is not used for DPF. Operation User This role is not used for DPF. [Contract] Authority Update Authority A role that can assign the following authorities on the role setting page
- [Contract] Update Role
- [Contract] View Role
- [Contract] Authority Update Role
- [Contract] Authority View Role
[Contract] Authority Reference Authority A role that can view the following assignment statuses on the role setting page
- [Contract] Update Role
- [Contract] View Role
- [Contract] Authority Update Role
- [Contract] Authority View Role
[Contract] Update Authority A person with this authority can add contacts for related services and options, and cancel contracts. [Configuration] Authority Update Authority A role that can assign the following authorities on the role setting page
- [Configuration] Update Role
- [Configuration] View Role
- [Configuration] Authority Update Role
- [Configuration] Authority View Role
[Configuration] Authority Reference Authority A role that can view the following assignment statuses on the role setting page
- [Configuration] Update Role
- [Configuration] View Role
- [Configuration] Authority Update Role
- [Configuration] Authority View Role
[Configuration] Update Authority A person with this authority can configure settings for services and options. [Configuration] Reference Authority A person with this authority can reference settings for services and options. - Click "Register."
Examples of role settings by major purpose
| No | Purpose | How to set the role to the target zone |
|---|---|---|
| 1 | To permit all types of management of the target zone, including Editing DNS Records | Add the IIJ ID Service account of the relevant person in the "[Configuration] Update Role" to the target zone’s service code (dpmxxxxxxxx). |
| 2 | To permit only information references of the target zone (changes to DNS records are not permitted) | Add the IIJ ID Service account of the relevant person in the "[Configuration] View Role" to the target zone’s service code (dpmxxxxxxxx). |
Cancelling the Role Assigned to an IIJ ID Service Account
Use the following procedure to cancel the role setting that is assigned to an account linked to the IIJ ID Service.
Select "Log in with IIJ ID" on the Login screen.
[ Reference ]
If you are logged in to the control panel, click "
" located in the upper right of the control panel to log out once.The IIJ ID Login screen appears.
Enter the account of the IIJ ID Service in "ID," and click "Next."[ Note ]
Log in to the zone whose role is to be cancelled, using the IIJ ID Service account to which any of the "[Contract] Authority Update Authority" and "[Configuration] Authority Update Authority" is set.
- Follow the instructions on the screen to enter the authentication information. The authentication information varies depending on the IIJ ID Service settings. Refer to the "IIJ ID Service Online Manual" for more information.
- Click "" located in the upper right of the control panel.
- Click "Authority Management Screen."
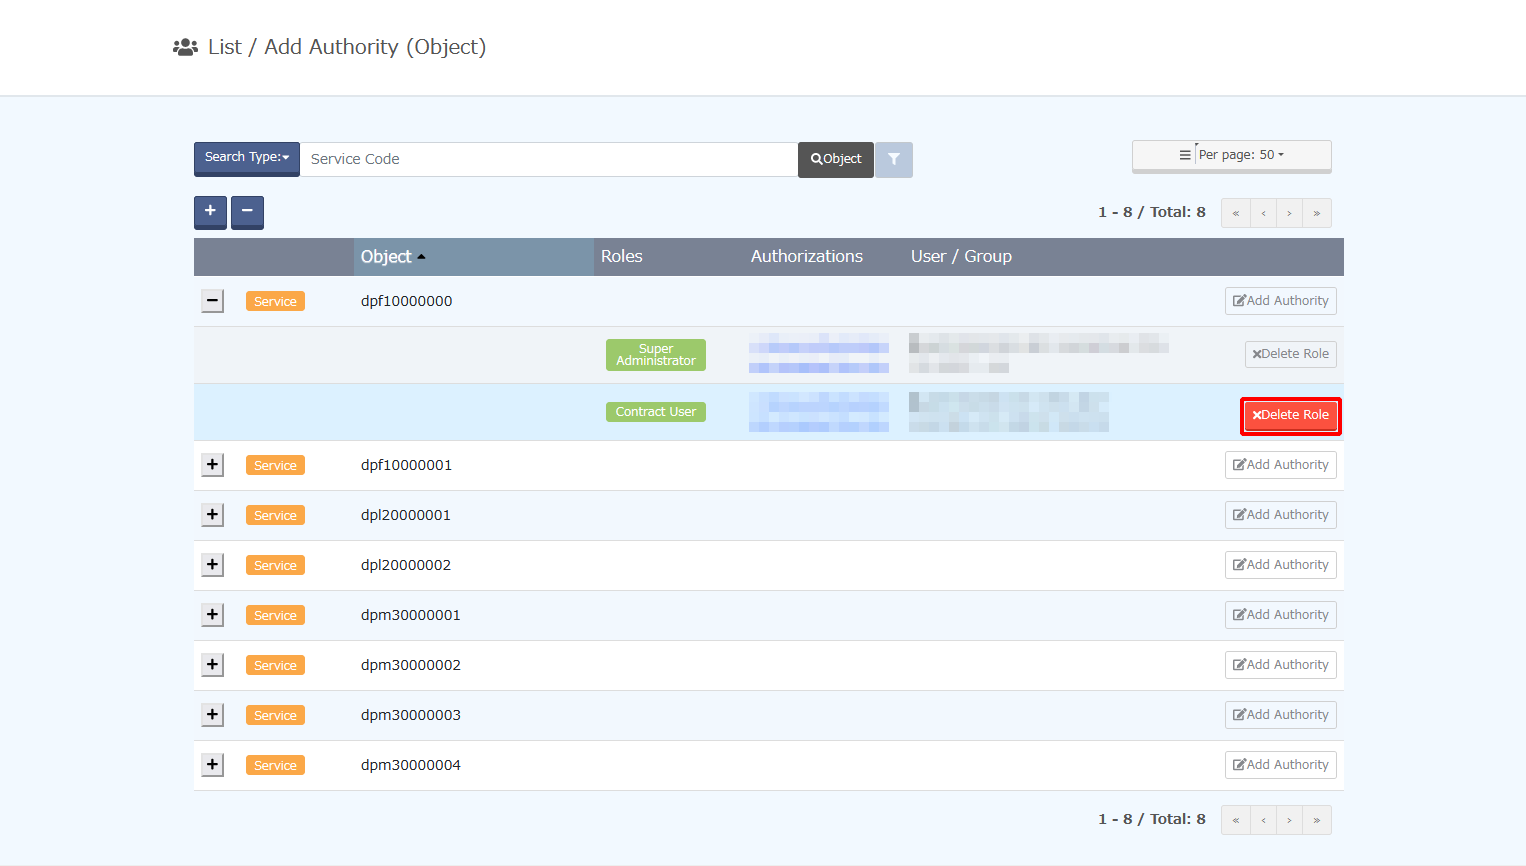
- Click "
 " for the target service code.
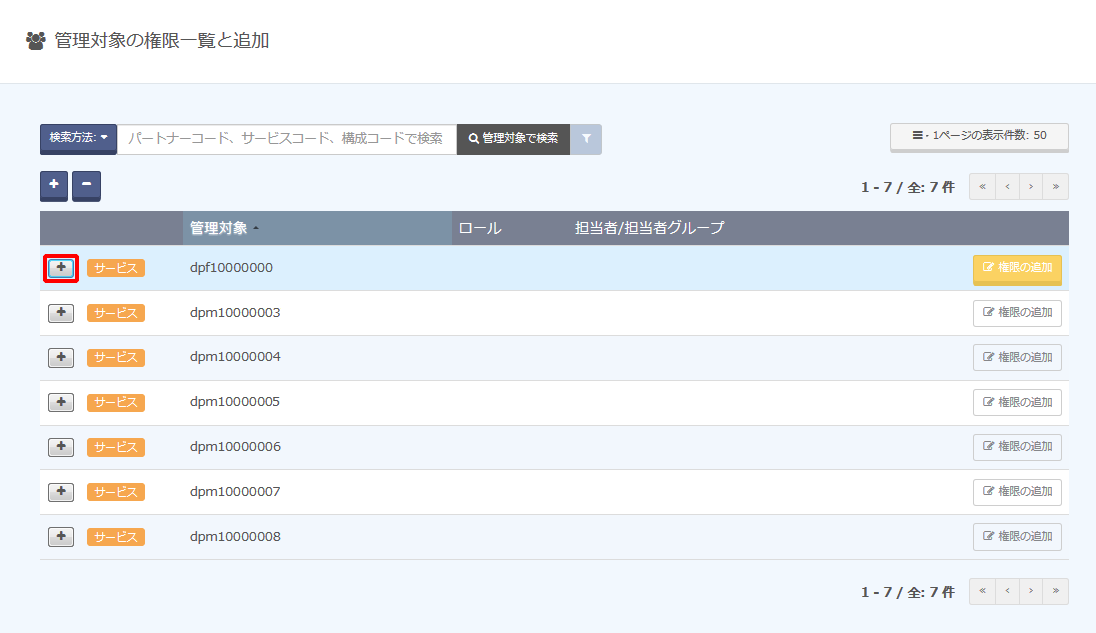
- Click "Delete Roll" for the target role.
- Select a target account to be cancelled from "Operations manager/operations manager group," and click "Confirm."
* If there is only one account for the operations manager and operations manager group registered with the target role/authority, the step of selecting a target account to be cancelled is skipped.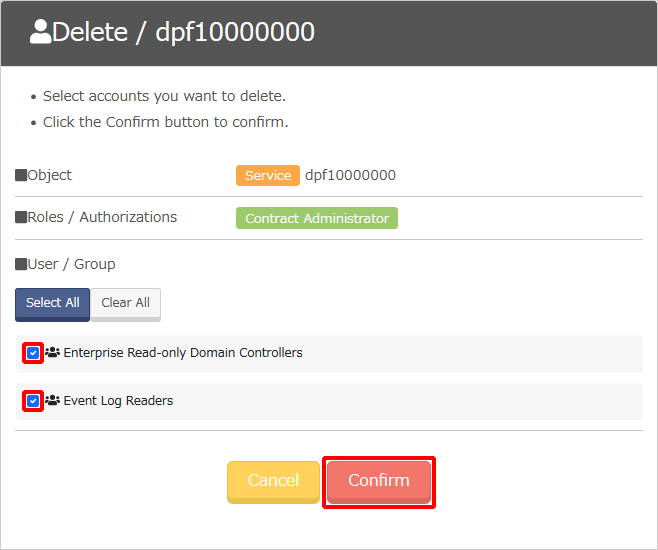
- Click "Delete."

Role names and authorities before and after March 29, 2023
The old role names (which were used before March 29) and the new roles and authorities corresponding to the old role names are as follows.
| Old role name | Roles/authorities | Notes | |
|---|---|---|---|
| New role name | Authority name | ||
| Full Role Manager | Super Administrator | ||
| Contract Manager | Contract Administrator | ||
| Engineering Manager | Config Operation Administrator | ||
| Contract Management Staff | Contract User | ||
| Engineering Management Staff | Config Operation Administrator |
||
| Contract Confirmation Staff | Not used | ||
| Engineering Confirmation Staff | Config Operation Reader | ||
| Contract Role Operator | ー |
[Contract] Authority Update Authority | |
| Contract Role Viewer | ー |
[Contract] Authority Reference Authority | |
| Contract Operator | ー |
[Contract] Update Authority | |
| Contract Viewer | Not used | ||
| Billing Role Operator | Not used | ||
| Billing Role Viewer | Not used | ||
| Billing Operator | Not used | ||
| Billing Viewer | Not used | ||
| Configuration Role Operator | ー | [Configuration] Authority Update Authority | |
| Configuration Role Viewer | ー | [Configuration] Authority Reference Authority | |
| Configuration Operator | ー | [Configuration] Update Authority | |
| Configuration Viewer | ー | [Configuration] Reference Authority | |
| Operation Group Role Operator | Not used | ||
| Operation Group Role Viewer | Not used | ||
| Operation Group Operator | Not used | ||
| Operation Group Viewer | Not used | ||
| Operation Role Operator | Not used | ||
| Operation Role Viewer | Not used | ||
| Operation Operator | Not used | ||
| Operation Viewer | Not used | ||
Authorities included in role
| No | Role name | Authority included |
| 1 | Super Administrator | [Contract] Authority Update Role, [Contract] Authority View Role, [Contract] Management Role, [Contract] Update Role, [Contract] View Role, [Billing] Authority Update Role, [Billing] Authority View Role, [Billing] Management Role, [Billing] Update Role, [Billing] View Role, [Configuration] Authority Update Role, [Configuration] Authority View Role, [Configuration] Approval Role, [Configuration] Update Role, [Configuration] View Role, [Operation] Authority Update Role, [Operation] Authority View Role, [Operation] Approval Role, [Operation] Update Role, [Operation] View Role, |
| 2 | Super User | [Contract] Management Role, [Contract] Update Role, [Contract] View Role, [Billing] Management Role, [Billing] Update Role, [Billing] View Role, [Configuration] Update Role, [Configuration] View Role, [Operation] Update Role, [Operation] View Role |
| 3 | Contract Administrator |
[Contract] Authority Update Role, [Contract] Authority View Role, [Contract] Management Role, [Contract] Update Role, [Contract] View Role, [Billing] Authority Update Role, [Billing] Authority View Role, [Billing] Management Role, [Billing] Update Role, [Billing] View Role, [Configuration] Authority Update Role, [Configuration] Authority View Role, [Operation] Authority Update Role, [Operation] Authority View Role, |
| 4 | Operation User | [Contract] Management Role, [Contract] Update Role, [Contract] View Role, [Billing] Management Role, [Billing] Update Role, [Billing] View Role |
| 5 | Config Operation Administrator | [Configuration] Authority Update Role, [Configuration] Authority View Role, [Configuration] Approval Role, [Configuration] Update Role, [Configuration] View Role, [Operation] Authority Update Role, [Operation] Authority View Role, [Operation] Approval Role, [Operation] Update Role, [Operation] View Role |
| 6 | Config Operation User | [Configuration] Update Role, [Configuration] View Role, [Operation] Update Role, [Operation] View Role |
| 7 | Config Operation Reader | [Configuration] View Role, [Operation] View Role |
| 8 | Invoice Reader | [Billing] View Role |
| 9 | Operation Administrator | [Operation] Authority Update Role, [Operation] Authority View Role, [Operation] Approval Role, [Operation] Update Role, [Operation] View Role |
| 10 | Operation User | [Operation] Update Role, [Operation] View Role |