Setting Auto Delete
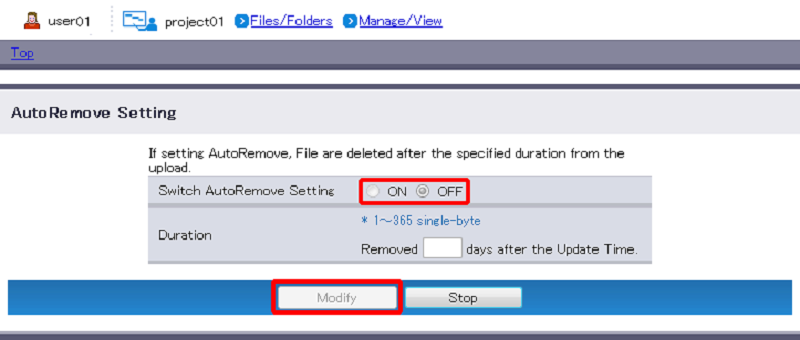
You can check the current status of auto delete on the right side of the "AutoRemove Setting". The default setting for auto delete is "OFF".
[ Note ]
- Only files in folders with auto delete set are deleted. Auto delete does not apply to subfolders within such a folder, or to files within those subfolders.
- Auto delete is based on the number of days that have passed since a file was modified. When you change the period of time set for auto delete, files that were last modified earlier than the auto delete period are deleted immediately.
- After the set auto delete period has passed, file deletion is carried out at an arbitrary time.
- When you copy a folder that has auto delete set, the auto delete setting is inherited by the target folder.
- When the AutoRemove Setting of the entire Project is "ON", the AutoRemove setting for folders is disabled, and the AutoRemove setting of the entire project is given priority. See ”Misc” for more information on the AutoRemove Setting of the entire Project.
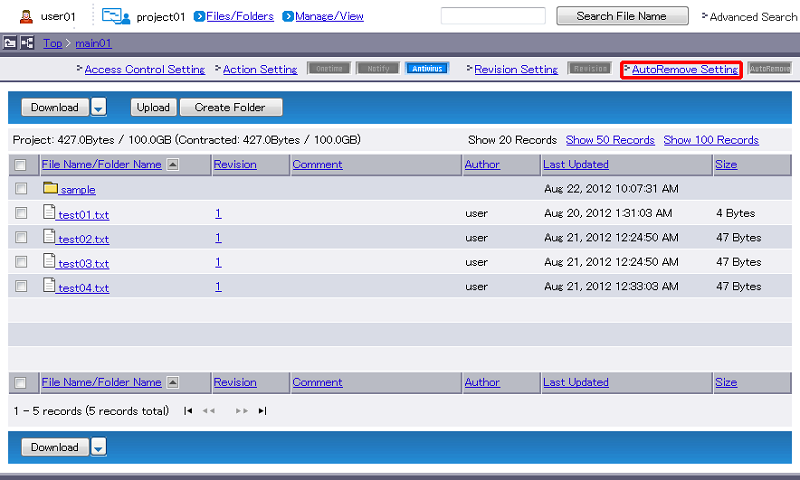
- Move to the folder you want to change the settings for (e.g. "sample"), and click "AutoRemove Setting".
- The auto delete setting is toggled.Select "ON" to carry out auto delete. Once this is done, specify the period after which auto delete will trigger, and then click "Modify". Select "OFF" to disable auto delete. Once this is done, click "Modify".
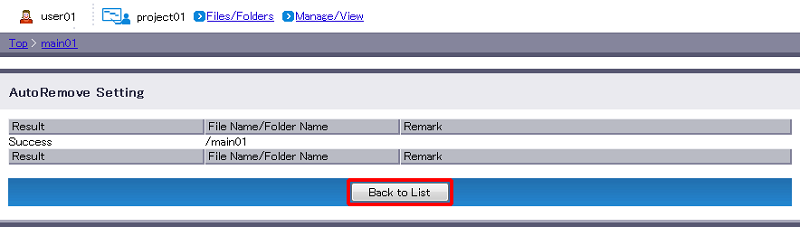
- The results of this action will appear. If the process fails, check the message displayed in "Remark", and then retry."Back to List" will revert you to Step 1.