Configuring Import Settings
[ Reference ]
In general use cases, it is recommended that you execute ID synchronization through export, not through import.
[ Note ]
Check the following points in advance before working on this task.
- Do not use the import function and export function of Azure AD simultaneously.
- If using these functions simultaneously, an IIJ ID User that has been created using the import function can no longer edited on the IIJ ID side.
- When using the export function, do not use the import function.
- Accounts must be synchronized from Active Directory to Azure AD by Azure AD Connect.
If an Azure AD user for which immutableId is not set has been imported, the relevant user can no longer log in to Microsoft 365 after Federation is completed.
Because Azure AD Connect creates an Azure AD user in a manner that immutableId is set, the relevant user can log in to Microsoft 365 continuously even after Federation is completed.
This section describes the procedure to import accounts from Azure AD into this service.
[ Note ]
Provisioning settings must be complete to import accounts from Azure AD.
Refer to "Provisioning with Azure AD (Microsoft 365)" for more information on provisioning.
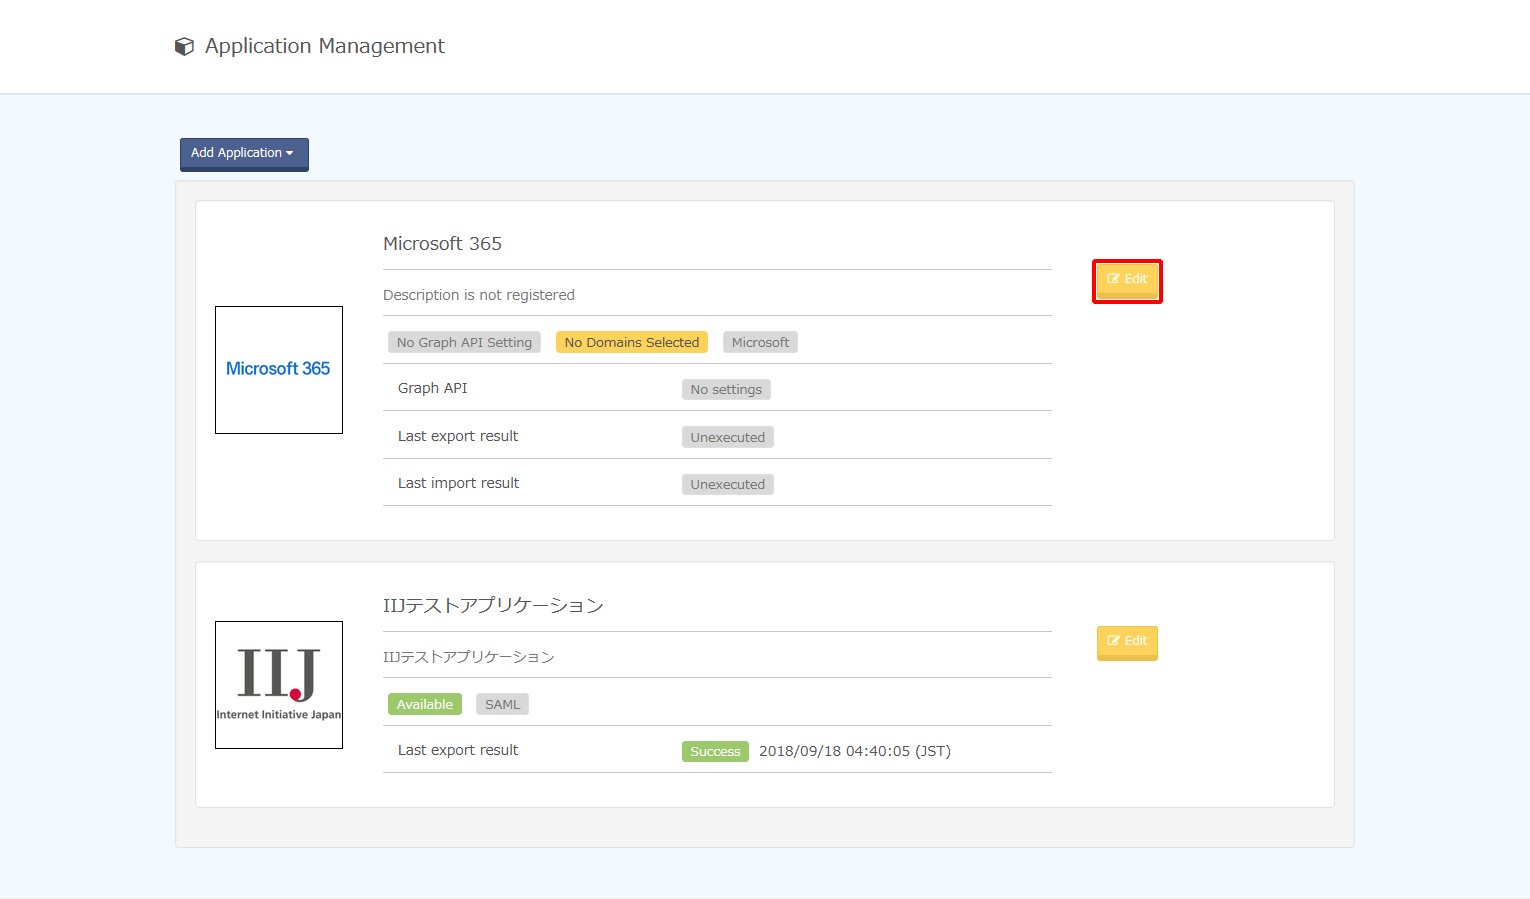
- Click "Application" and then "Application Management."

- Click "Microsoft 365" and then "Edit."
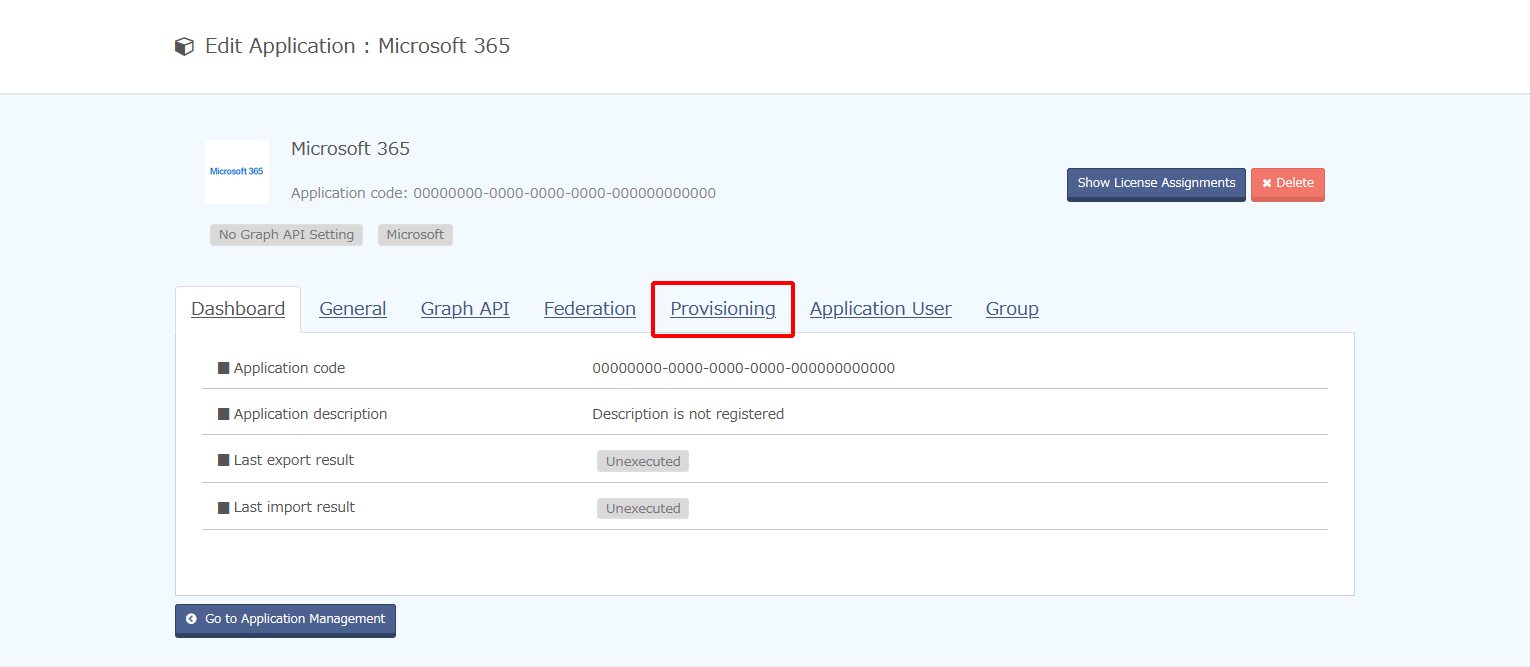
- Click "Provisioning."
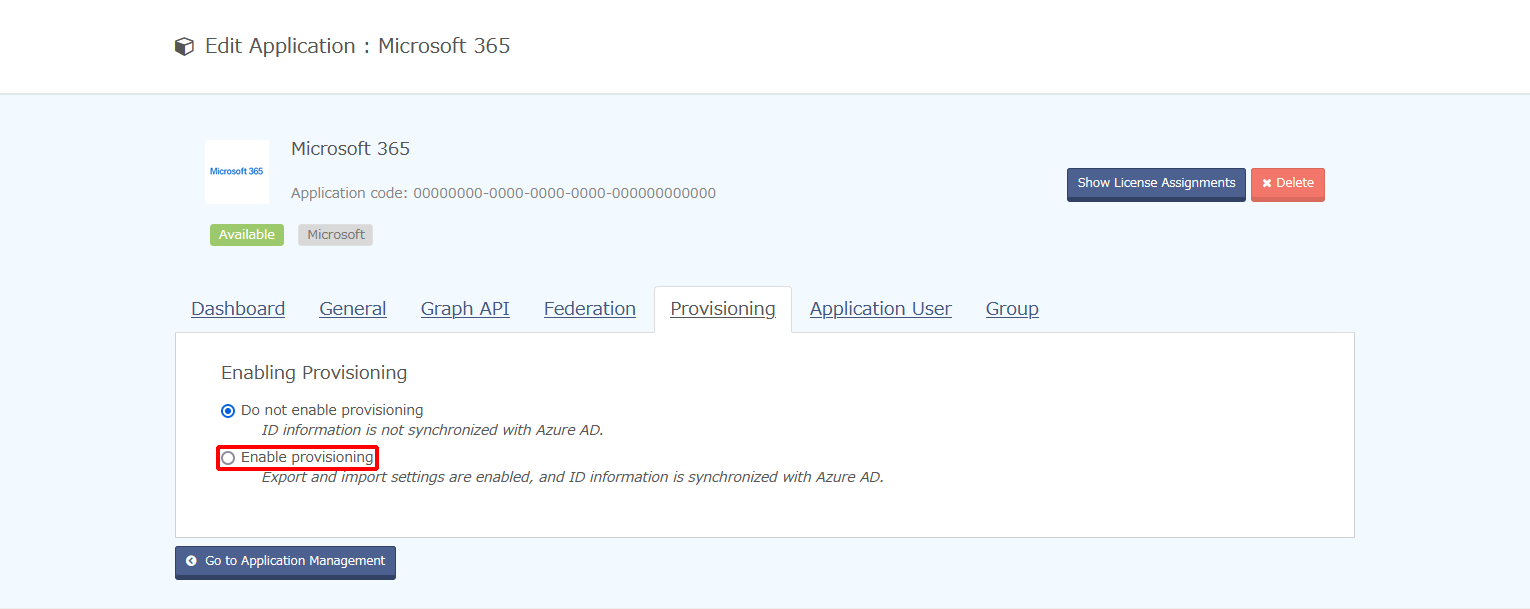
- Click "Enable provisioning."
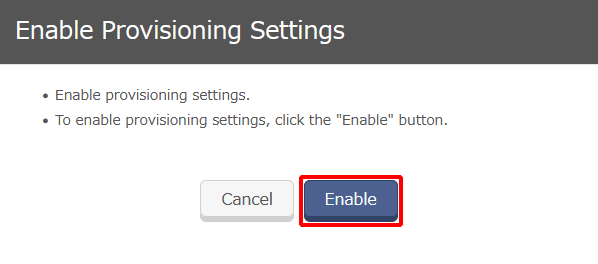
- Click "Enable."
- Change the import settings and then click "Update Import Settings."
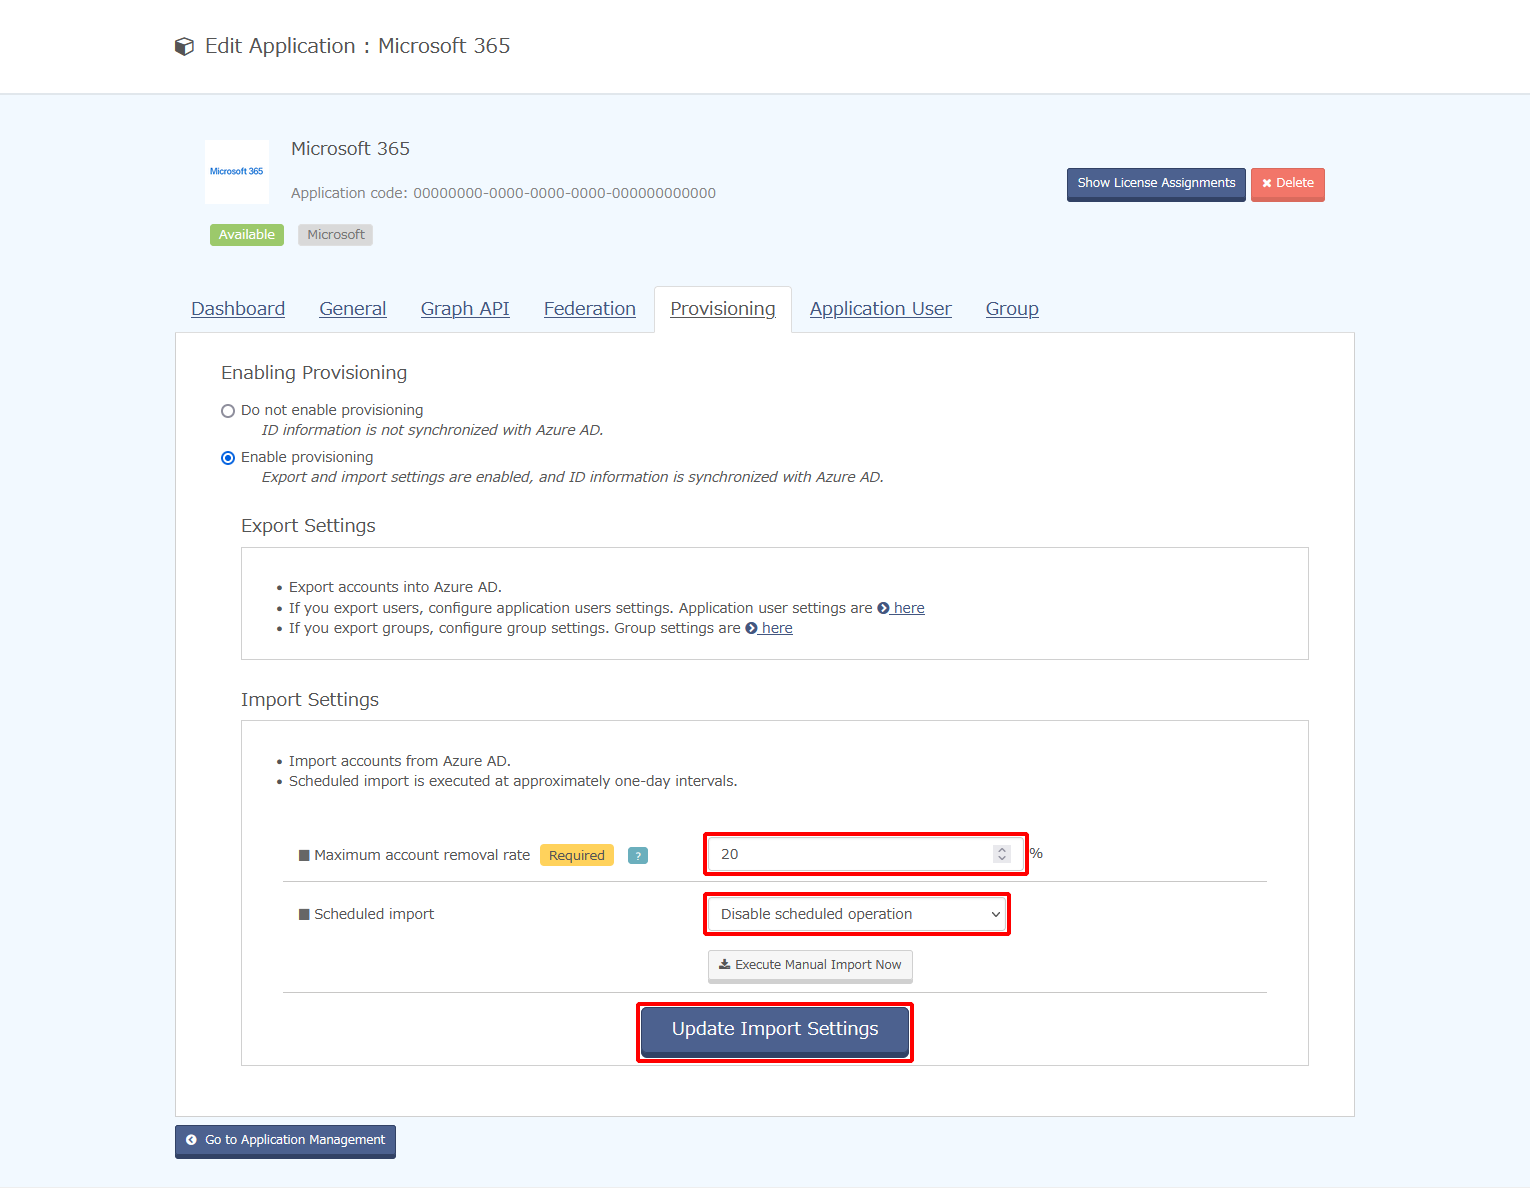
Option Description Maximum account removal rate Refer to "Glossary" for more information on the maximum account removal rate. Scheduled import Select whether to run the import process periodically.
Select "Perform scheduled operation" to import accounts from Azure AD periodically.
[ Reference ]
Click "Start Import" to manually run the import process.