Registering Active Directory of IIJ Directory Service for Microsoft
This section describes the procedure to register Active Directory to federate with this service.
[ Reference ]
The Active Directory account to be created in this procedure will be registered in Active Directory as an SPN (Service Principal Name).
An SPN is a name for clients to uniquely identify a service instance and is actually information that maps a service name (port number), a computer to execute the service, and an account to execute the service (service account).
Create an Active Directory account to access Active Directory servers beforehand.
Access Active Directory and create an Active Directory account with the Active Directory account-creation right and WinRM execution right.[ Reference ]
Refer to “IIJディレクトリサービス for Microsoft マニュアル (Japanese Only)” for more information on how to create Active Directory accounts in IIJ Directory Service for Microsoft.
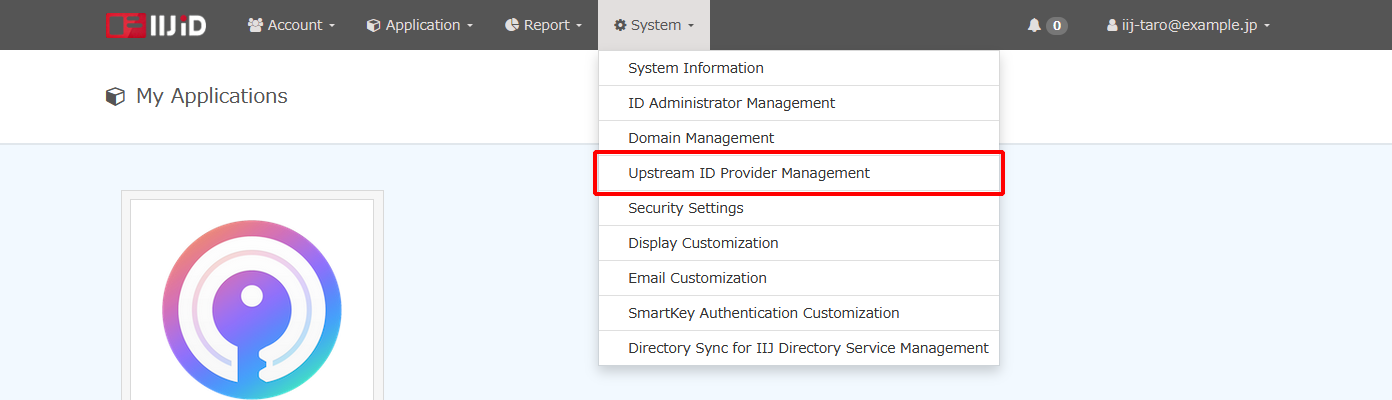
- Click "System" and then "Upstream ID Provider Management."
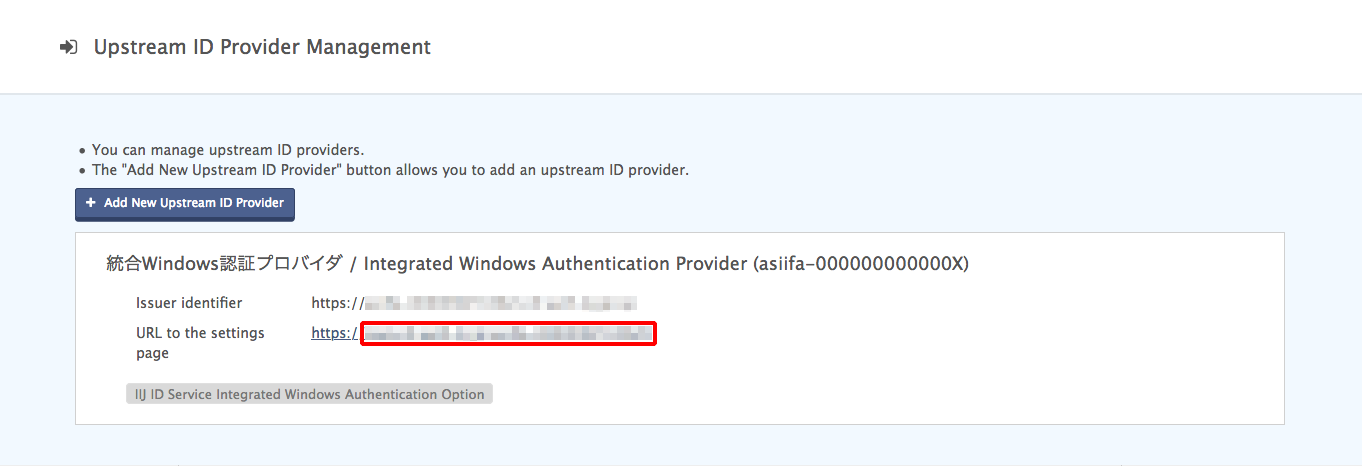
- Click the URL that appears next to “URL to the settings page” under “Integrated Windows Authentication Provider.”
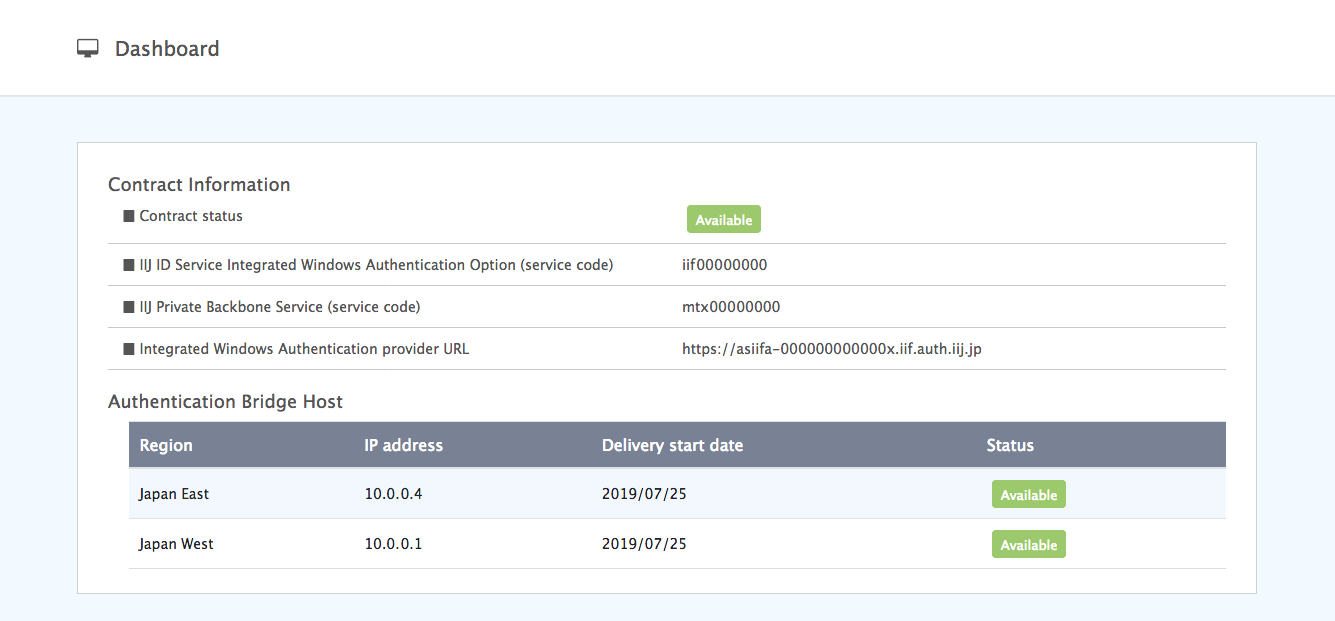
- The dashboard of the Integrated Windows Authentication provider settings page appears.
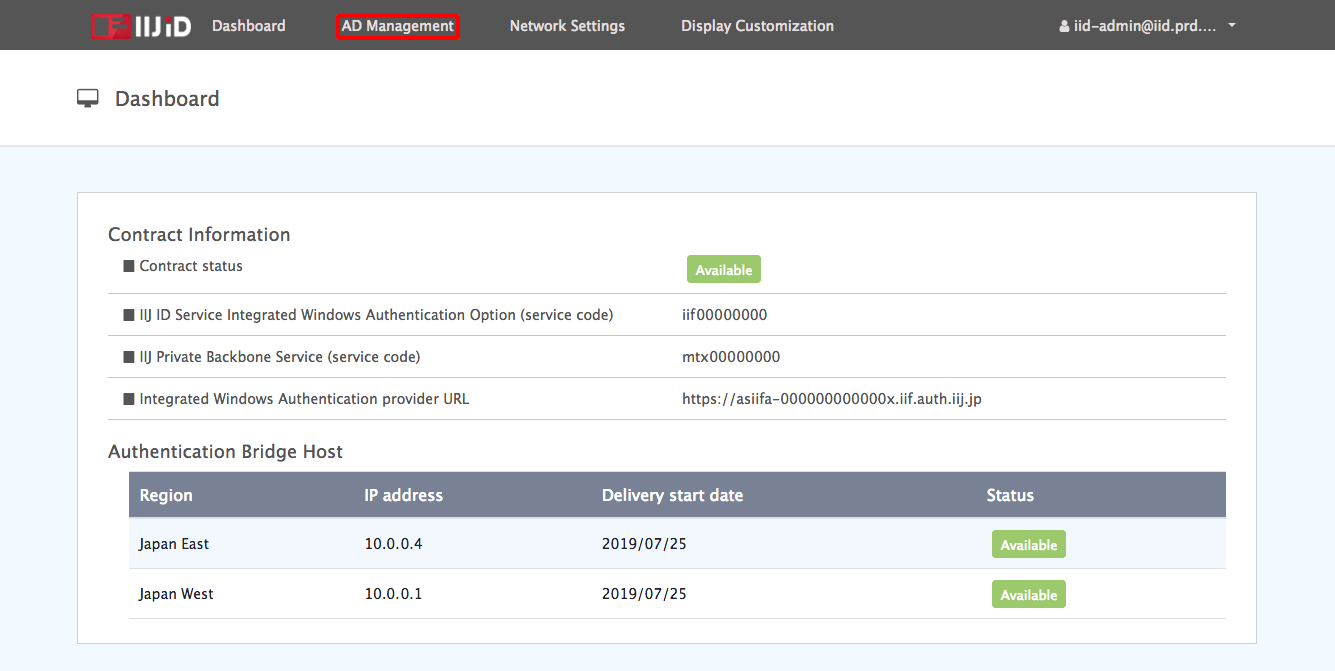
- Click “AD Management.”
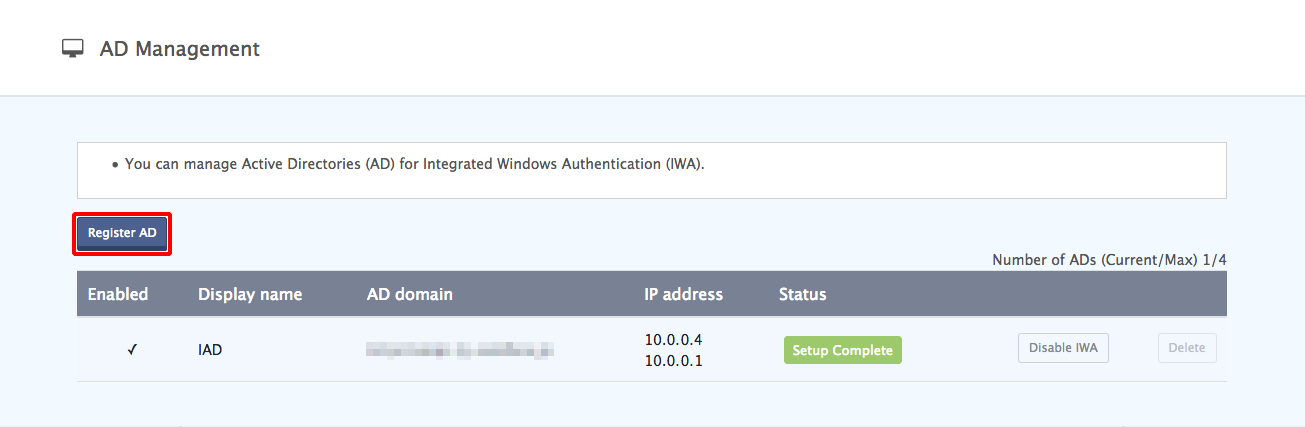
- Click “Register AD.”
Select “Obtain AD information automatically” and enter the information of Active Directory to form a federation with.
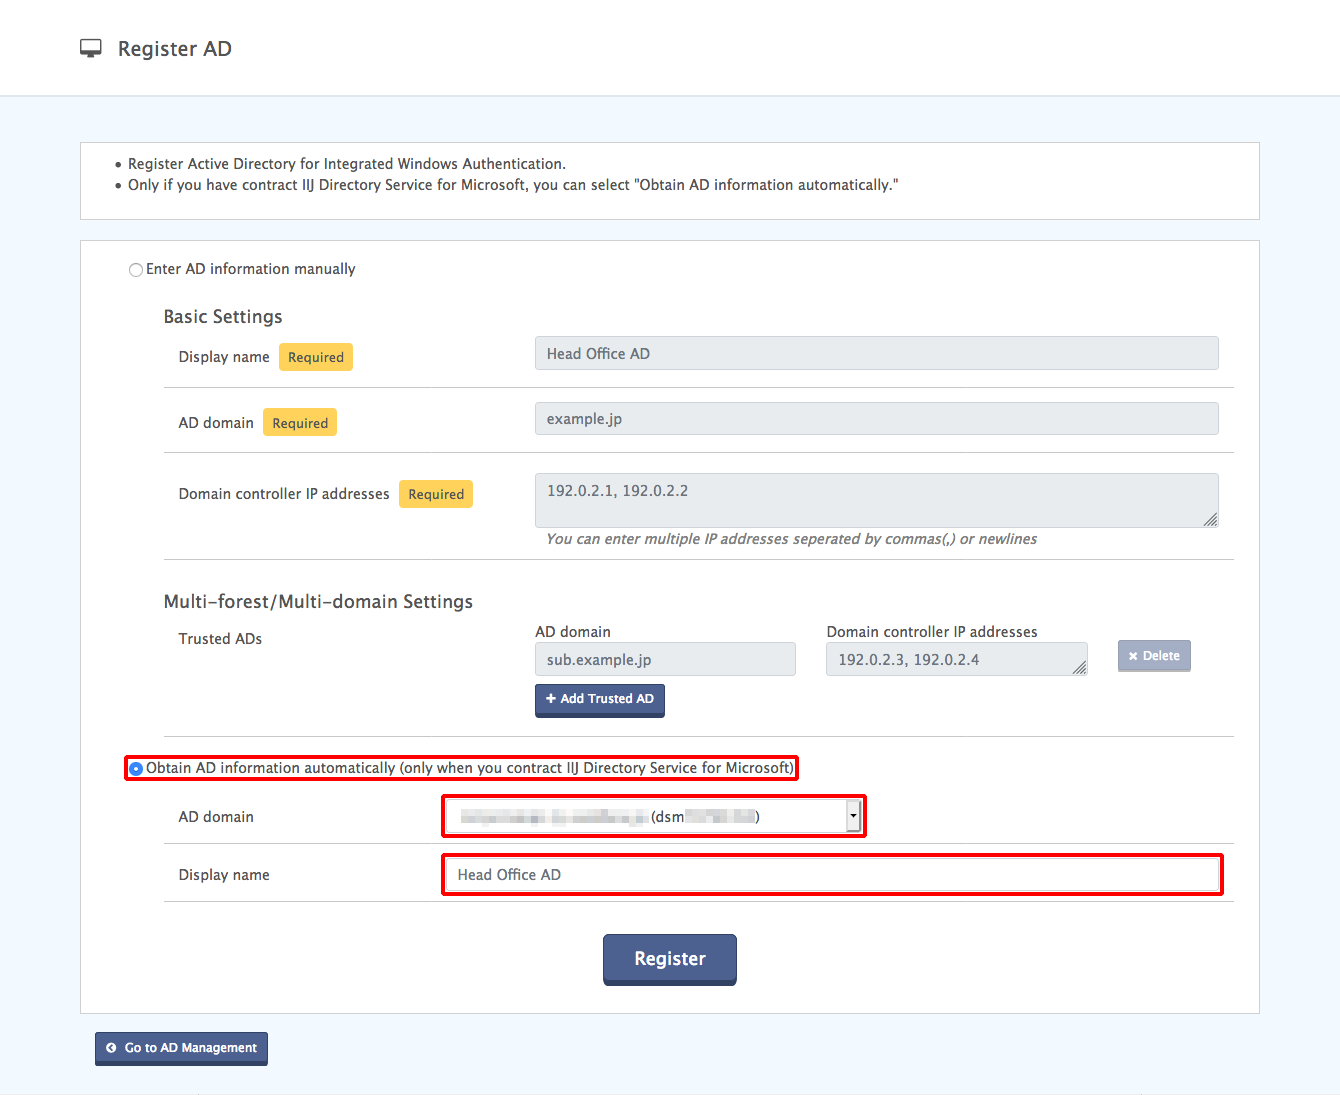
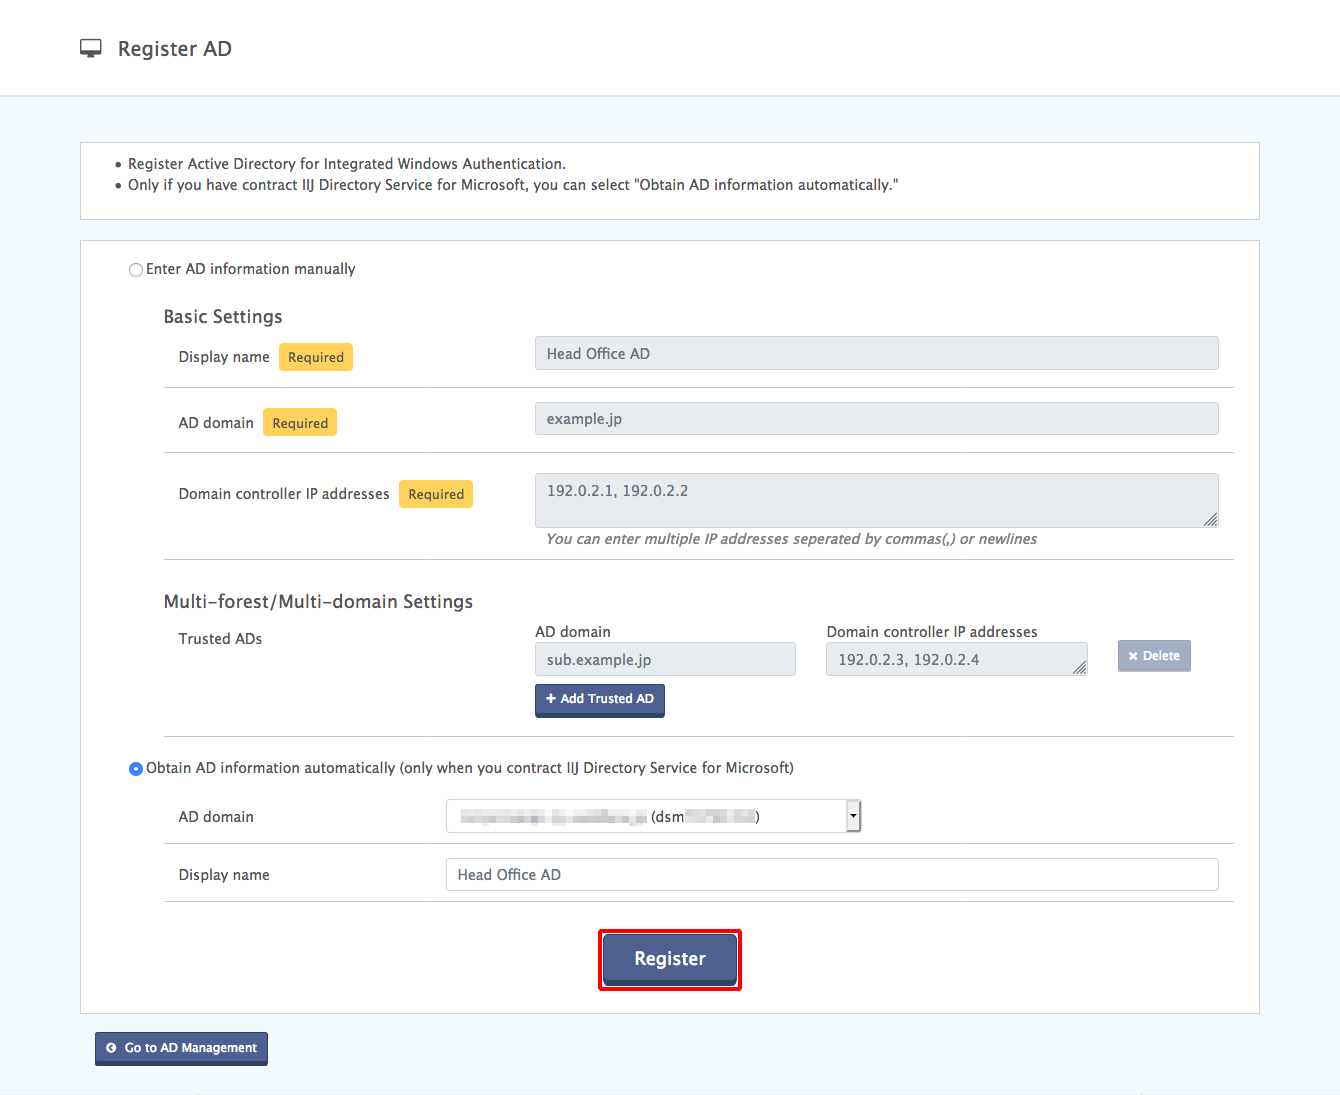
Option Description Example AD domain Select the AD used in the IIJ Directory Service for Microsoft. example.com (service code: dsm00000000) Display name Name displayed in this service Head Office AD - Click "Register."
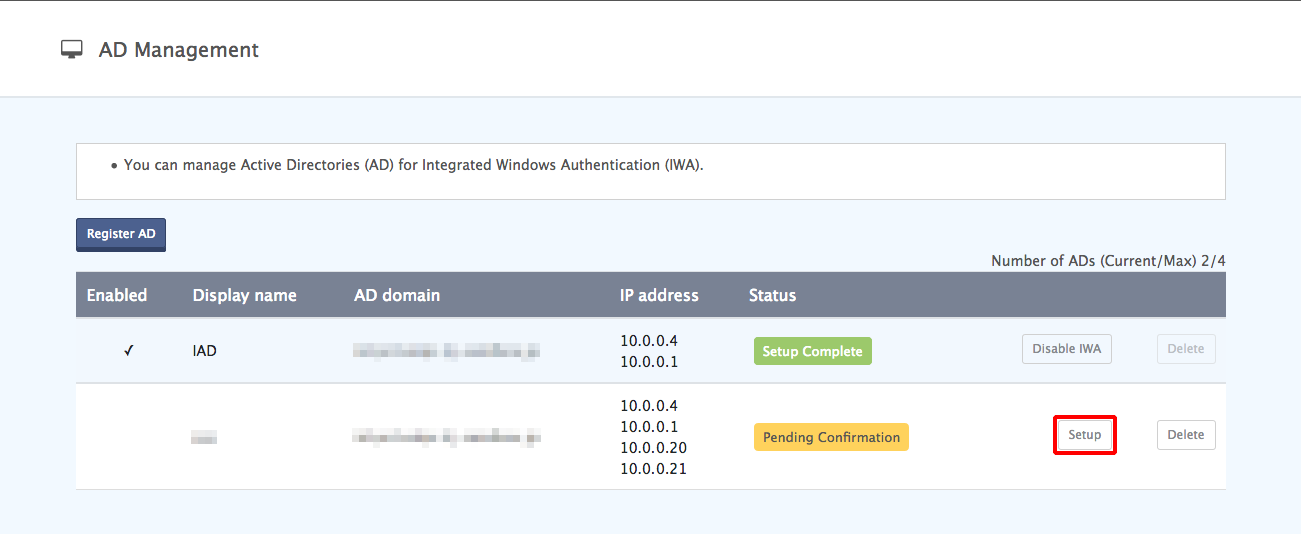
Click “Setup” for the registered AD.
[ Reference ]
If an AD server of the AD domain name, which is the same as that of the "Setup Complete" AD server being displayed on the screen, is registered, refer to "Setting up an AD Server of the Same Domain as that of the AD Server which Has Been Set up" for information on the subsequent procedures.
- Enter the information of the Active Directory account that you created in step 1.
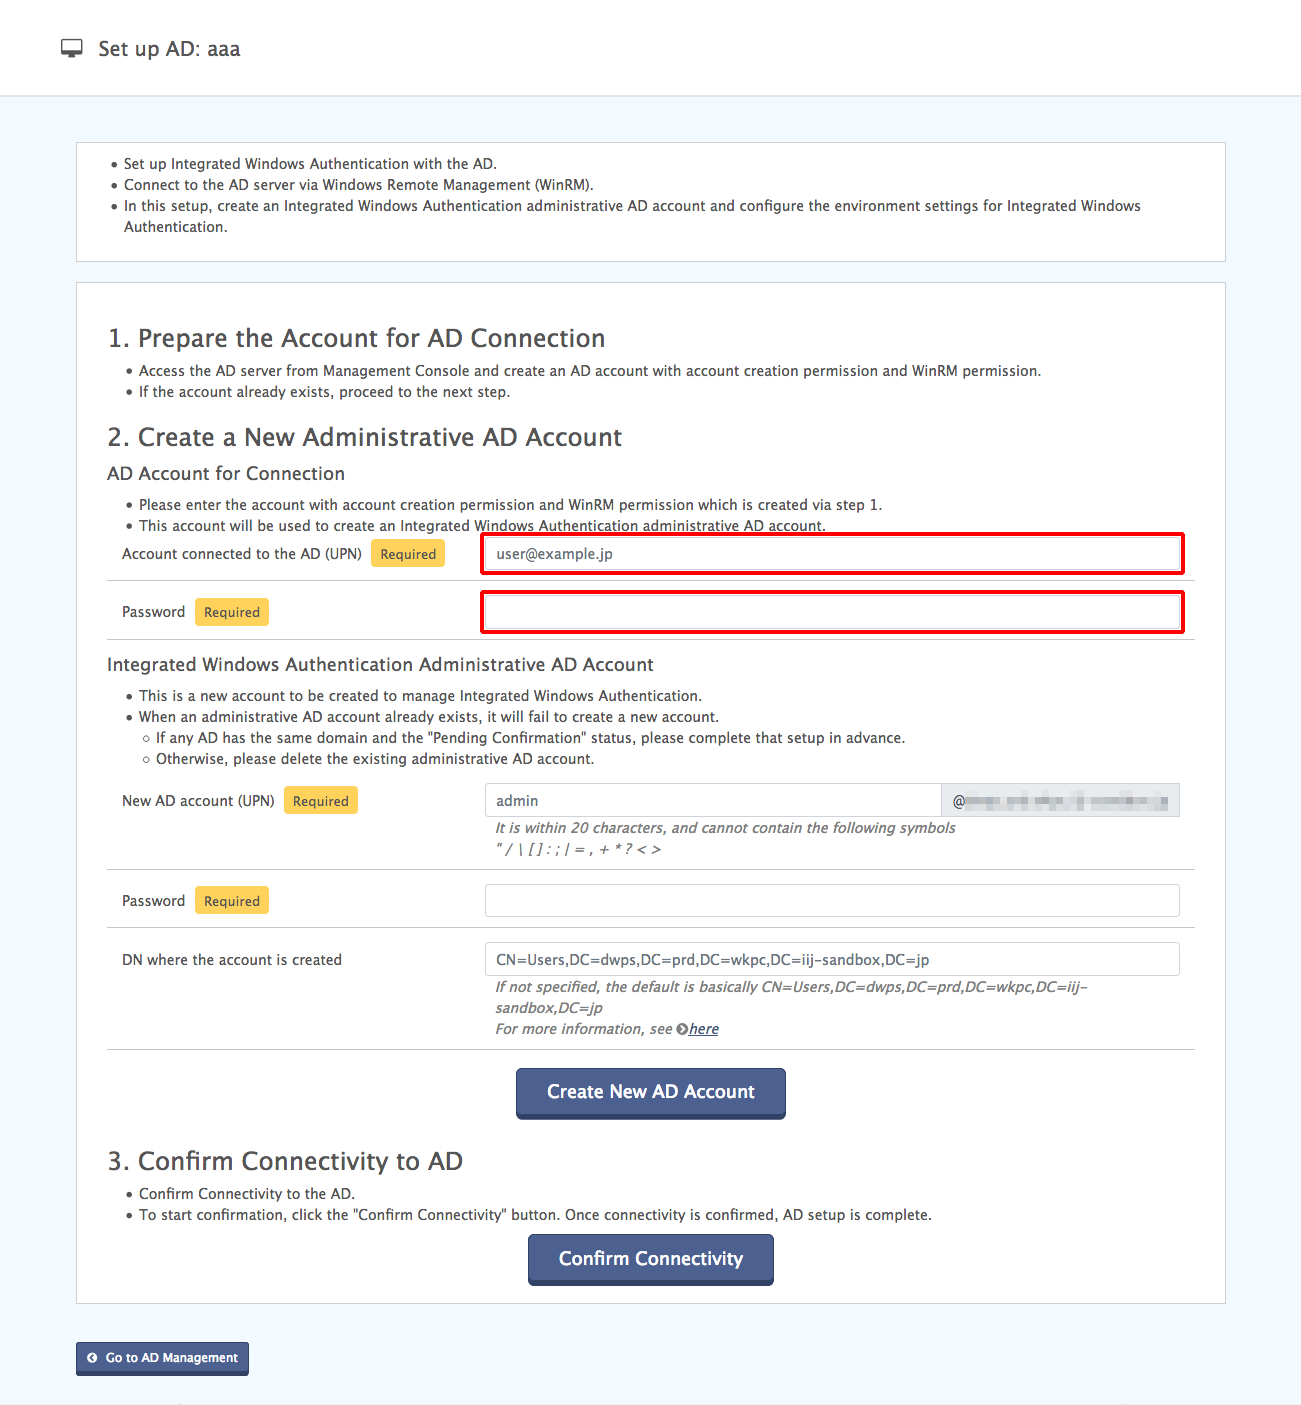
Enter in “New AD account” the user principal name of the new administration AD account that you create for Integrated Windows Authentication, and then fill in “Password.”
Click “Create New AD Account.”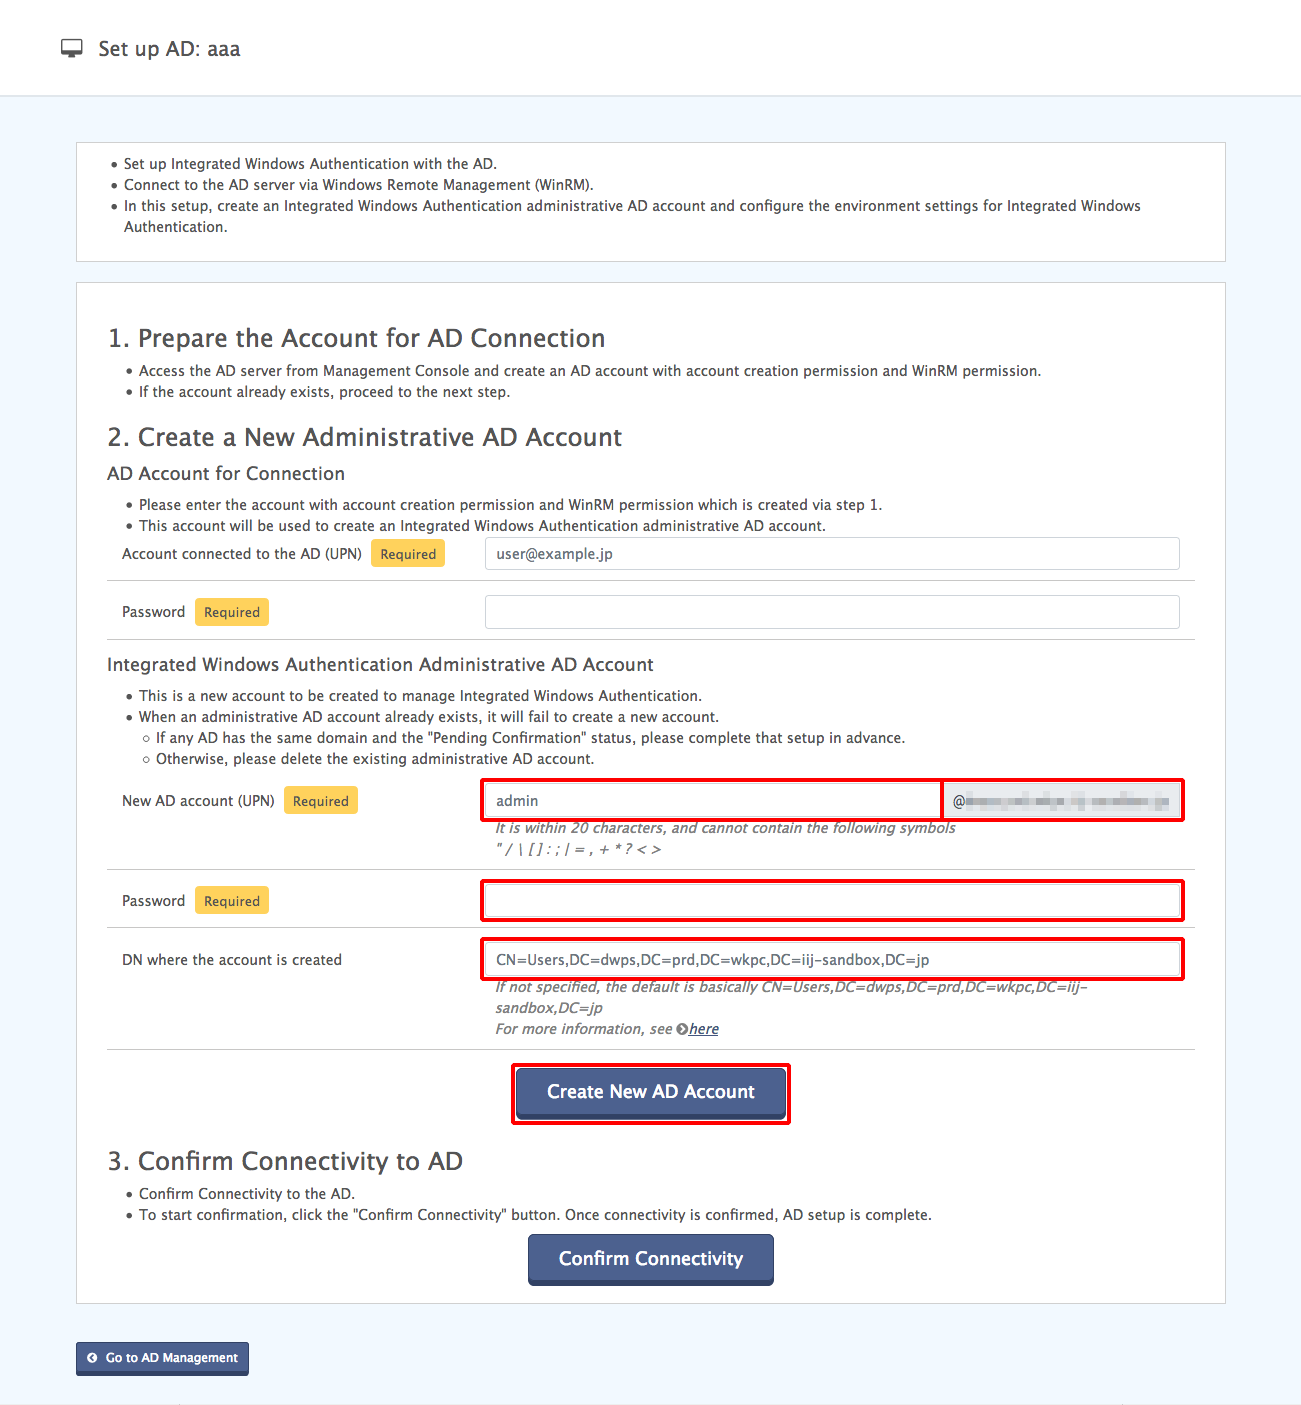
Option Required Content Example New AD account (UPN) Yes Enter an account name admin Password Yes Enter an account password DN where the account is created Enter a DN (Distinguished Name) to create an account with.
If this field is empty, the Users container (e.g.,CN=Users,DC=example,DC=com) is usually used to create an account. *1
OU=people,DC=example,DC=com *1 An account is created using the New-ADUser PowerShell command. The destination of the account to be created is as specified by the default value of this command. (Reference: https://learn.microsoft.com/en-us/powershell/module/activedirectory/new-aduser?view=windowsserver2022-ps (English))
[ Note ]
Do not modify or perform other operations on the created Integrated Windows Authentication Administrative AD Account.Any of the following operations prevents Integrated Windows Authentication from functioning correctly.
- Deleting the account
- Changing the password of the account
- Disabling the account
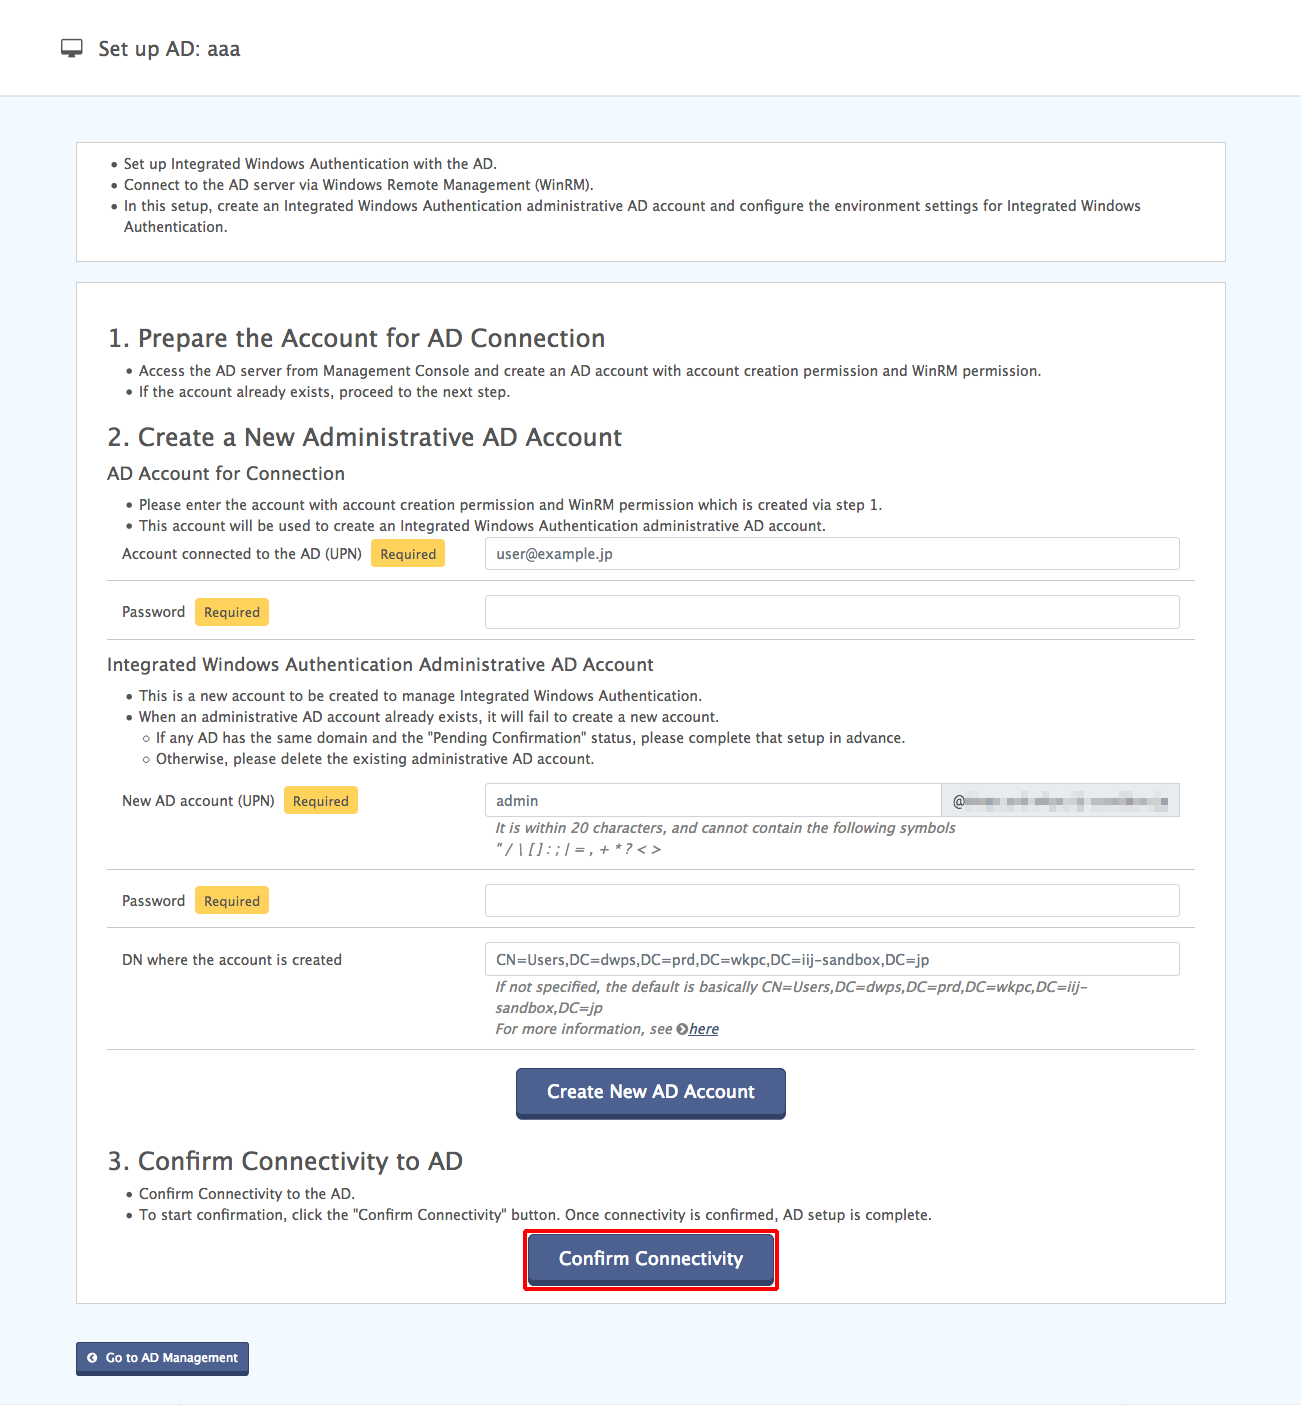
Click “Confirm Connectivity” to check the connectivity from IIJ ID Service to AD.
Setting up an AD Server of the Same Domain as that of the AD Server which Has Been Set up
When registering an AD server of the AD domain which is the same as that of the "Setup Complete" AD server to be displayed on the screen for step 9 to replace the AD server, click "Setup" of the new AD server in step 9 to display the following screen (If the condition is not satisfied, the screen for step 10 and subsequent steps shown above is displayed).
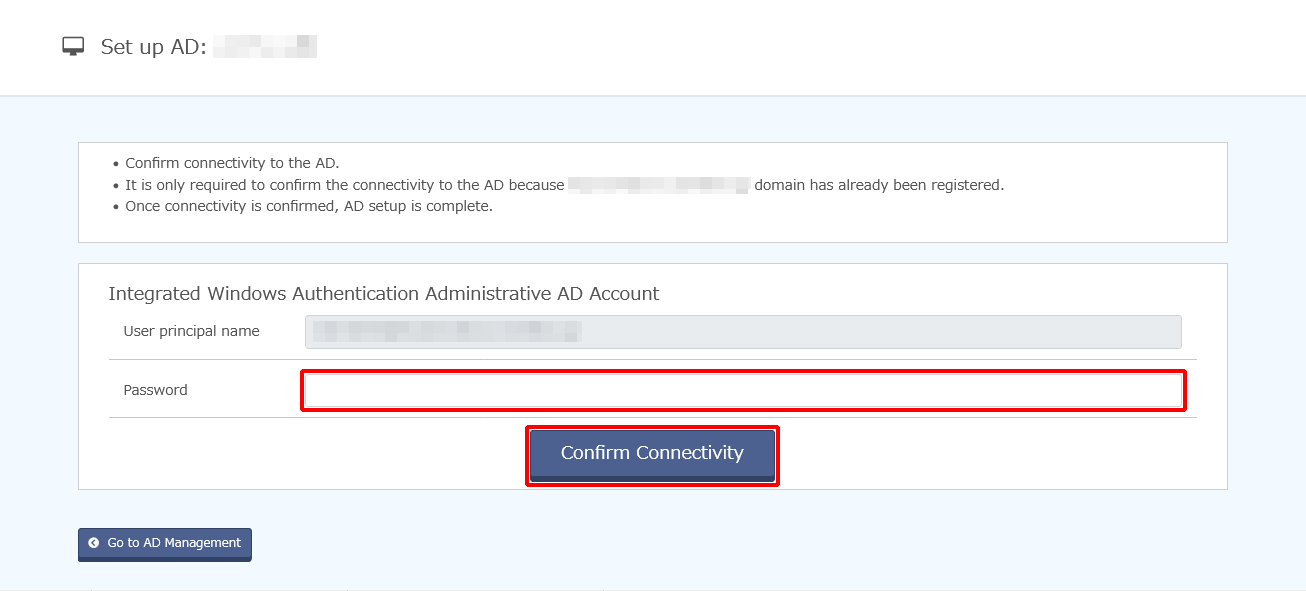
With respect to the new AD server, you are to continuously use the "Integrated Windows Authentication Administrative AD Account" used for the "Setup Complete" AD server of the same AD domain name.
Enter a password and click "Confirm Connectivity." If the connectivity is completed successfully, the new AD server has been set up.